I found out that construction and carpentry are some of my favorite hobbies, which allow me to take a break from my engineering career. I love designing and making technical drawings that later on become real buildings and structures. In construction, you can use your imagination and creativity to create sensible and useful designs that in conjunction with technical knowledge and lots of hard work can become real, sturdy structures that will provide shelter, convenience, or just simplify someone’s life.
Workshop
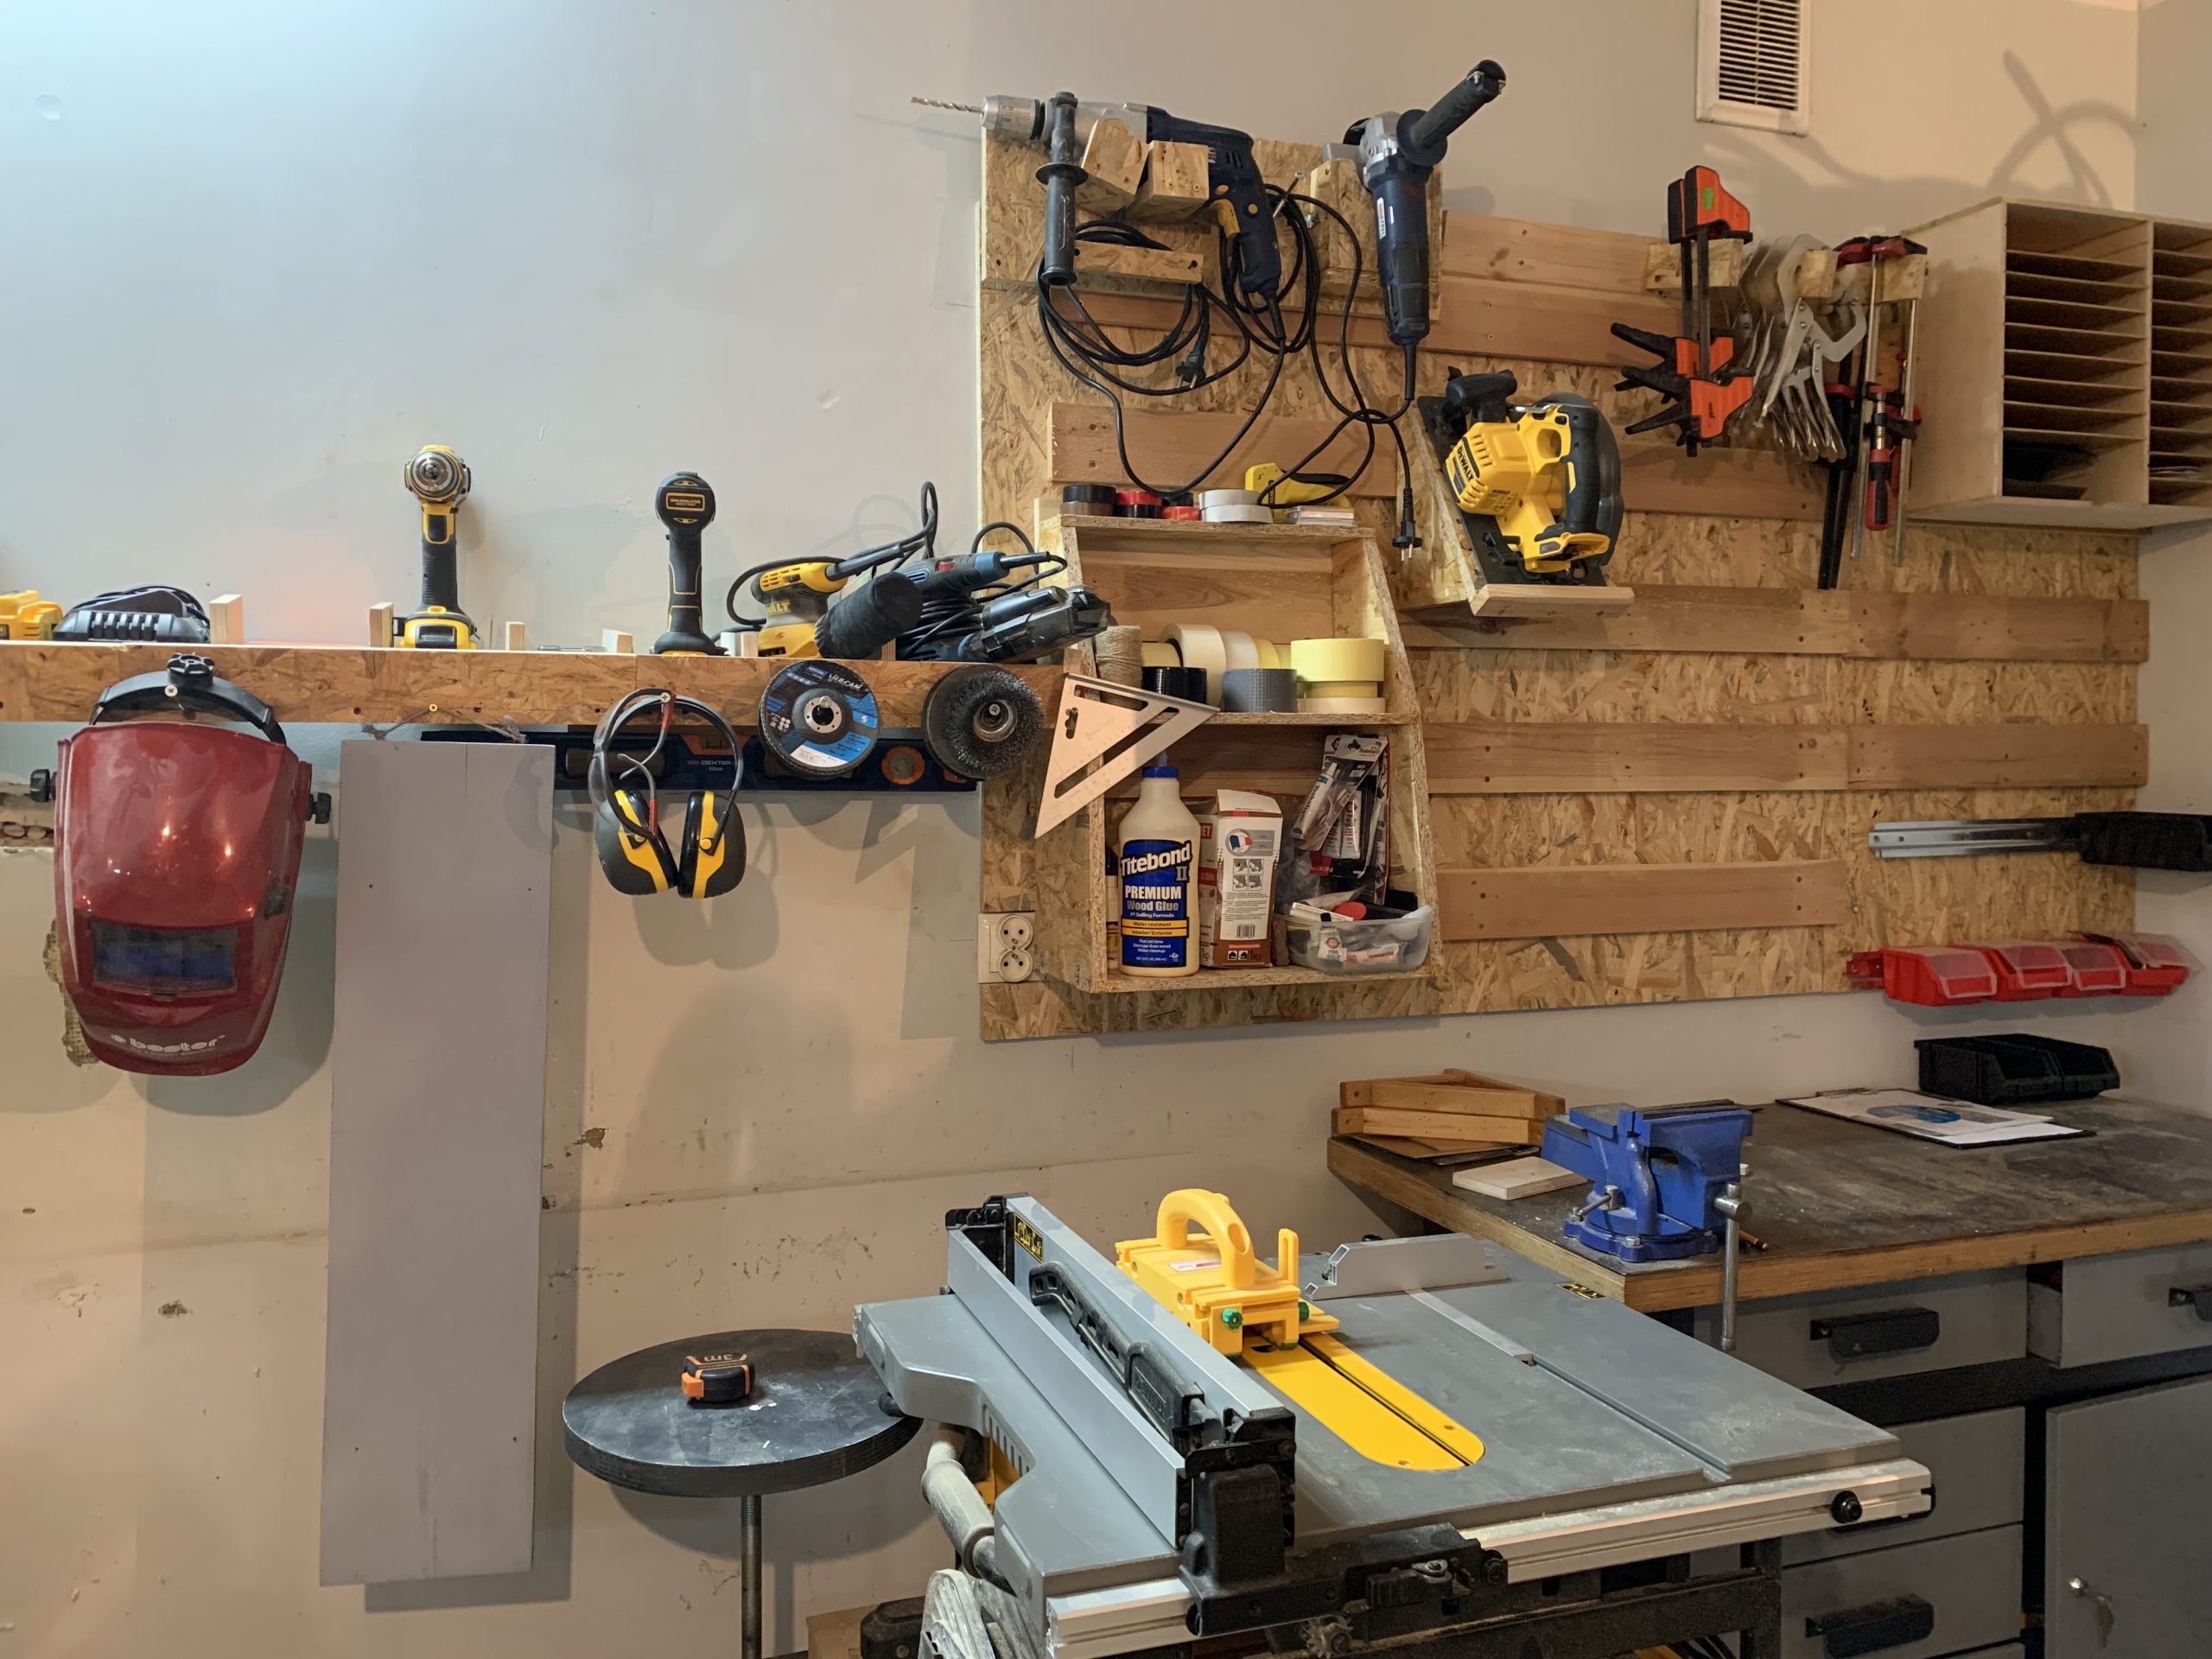
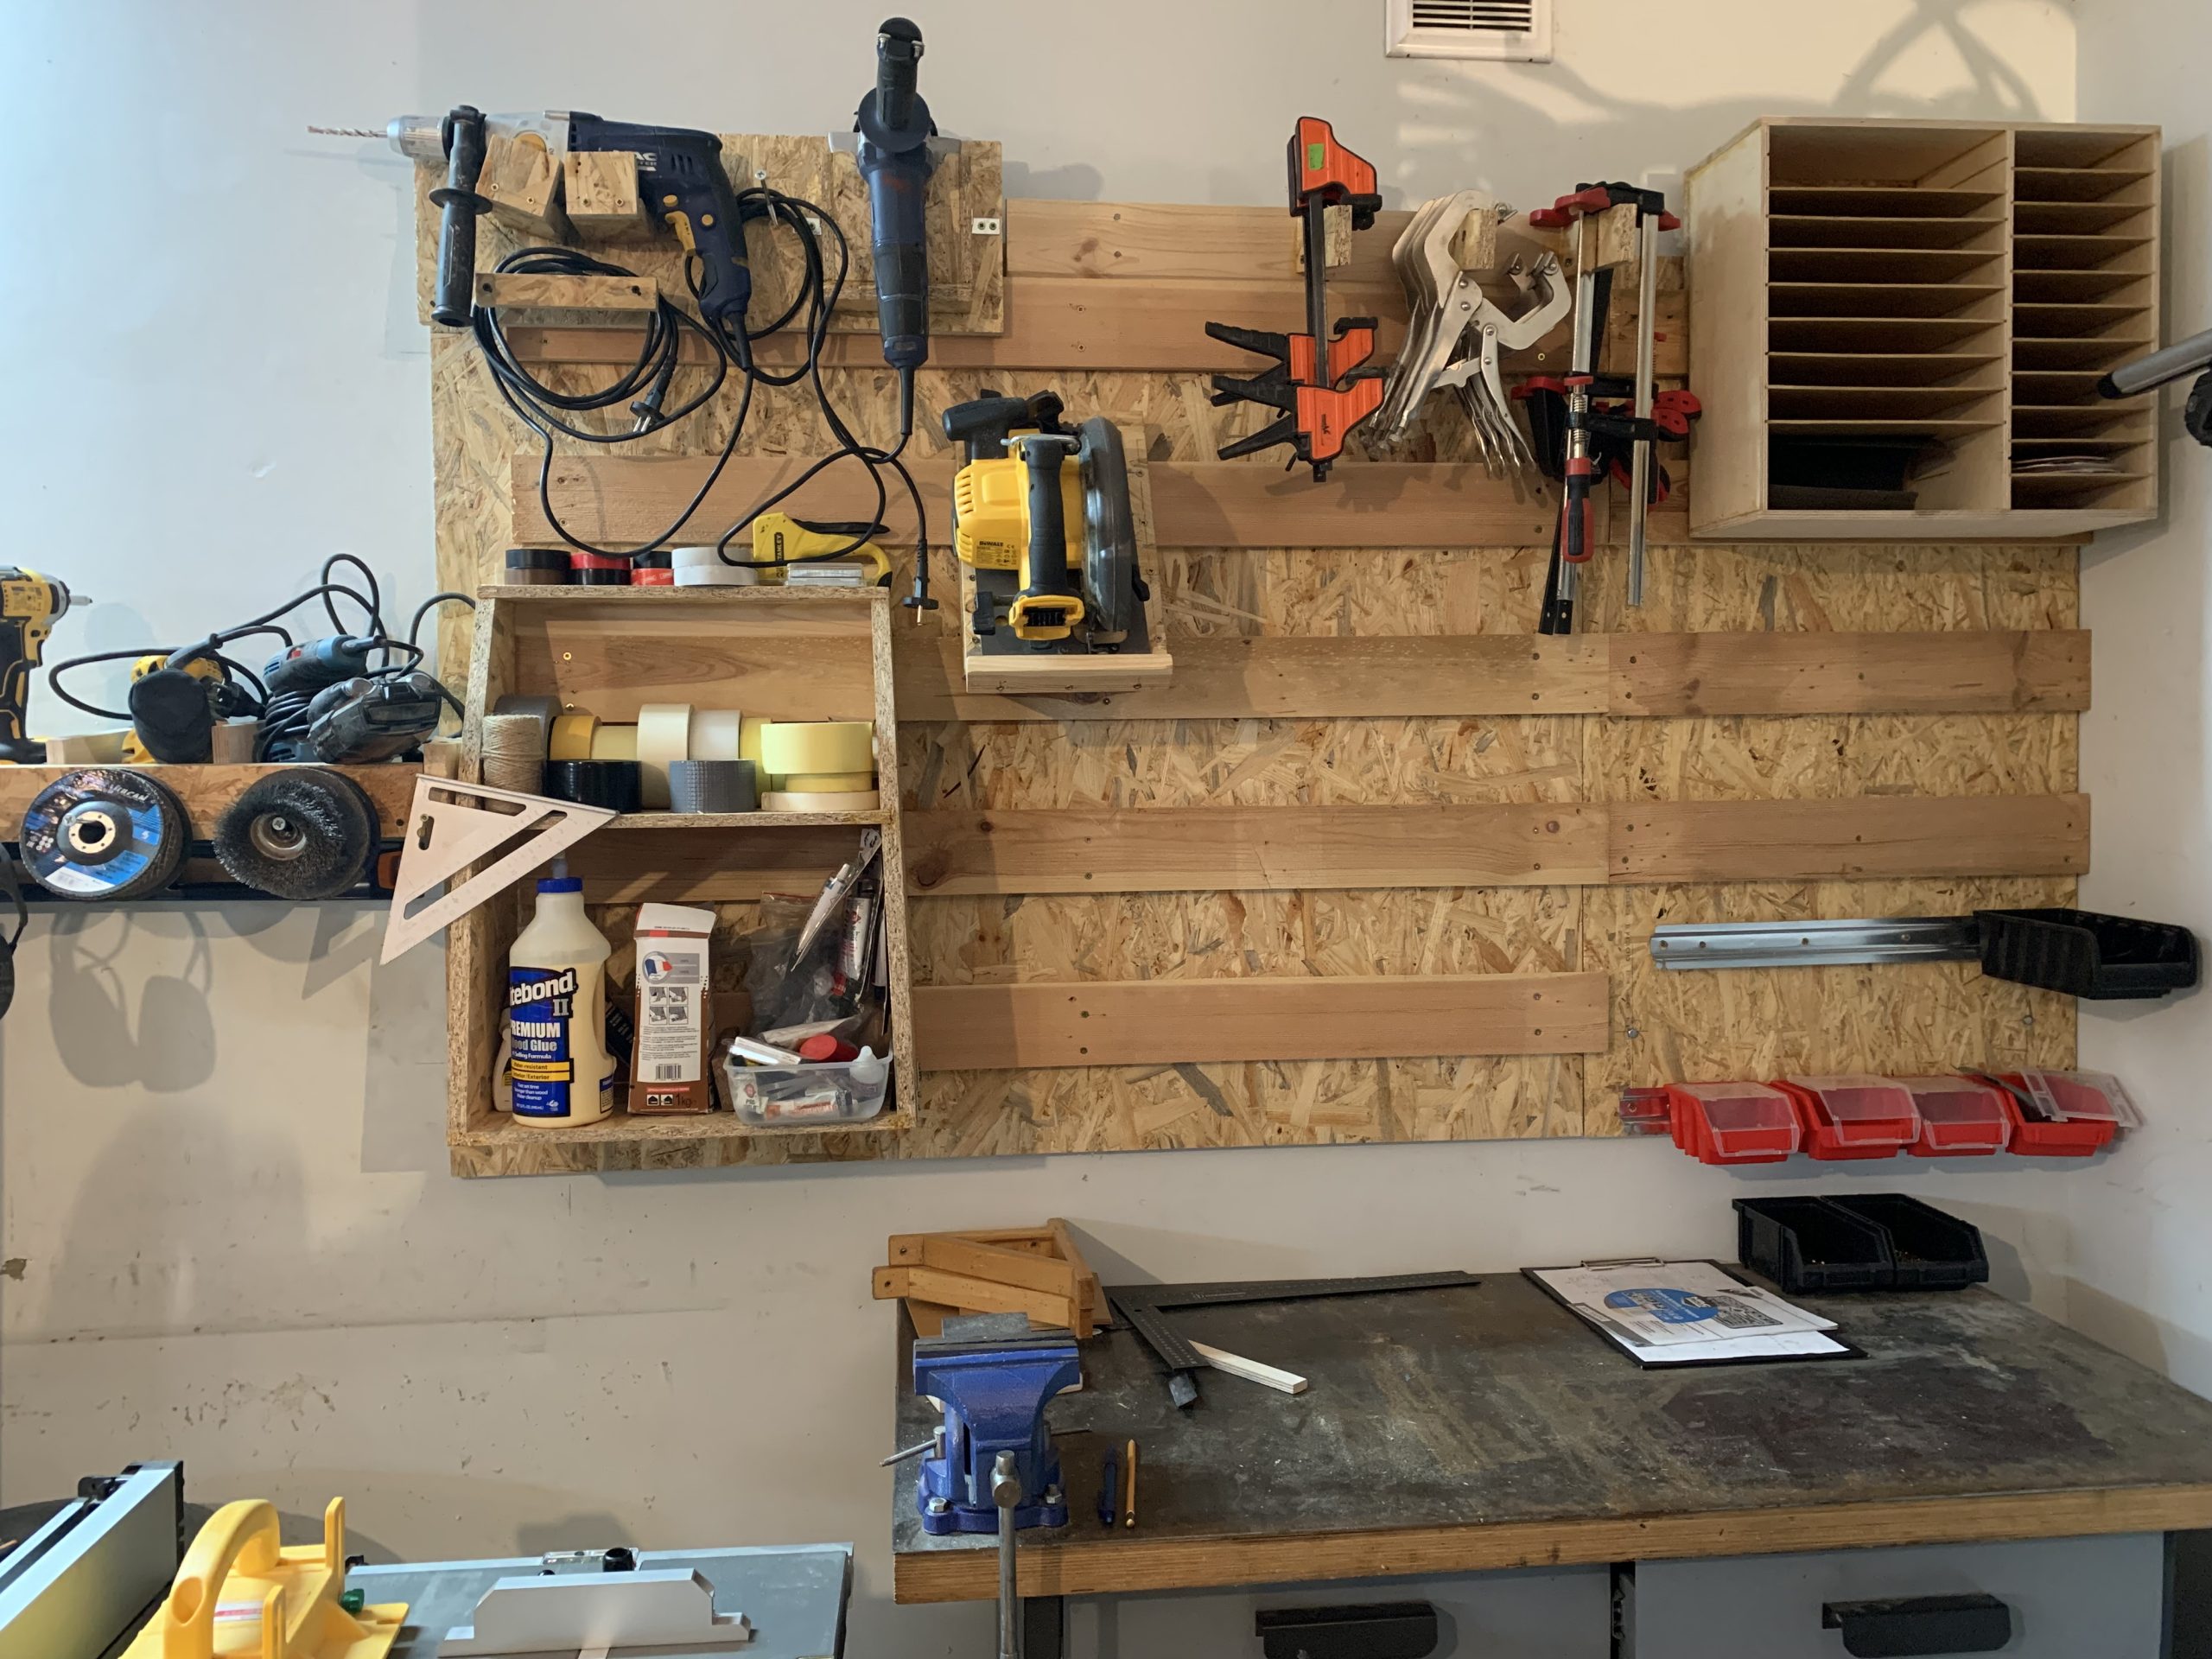
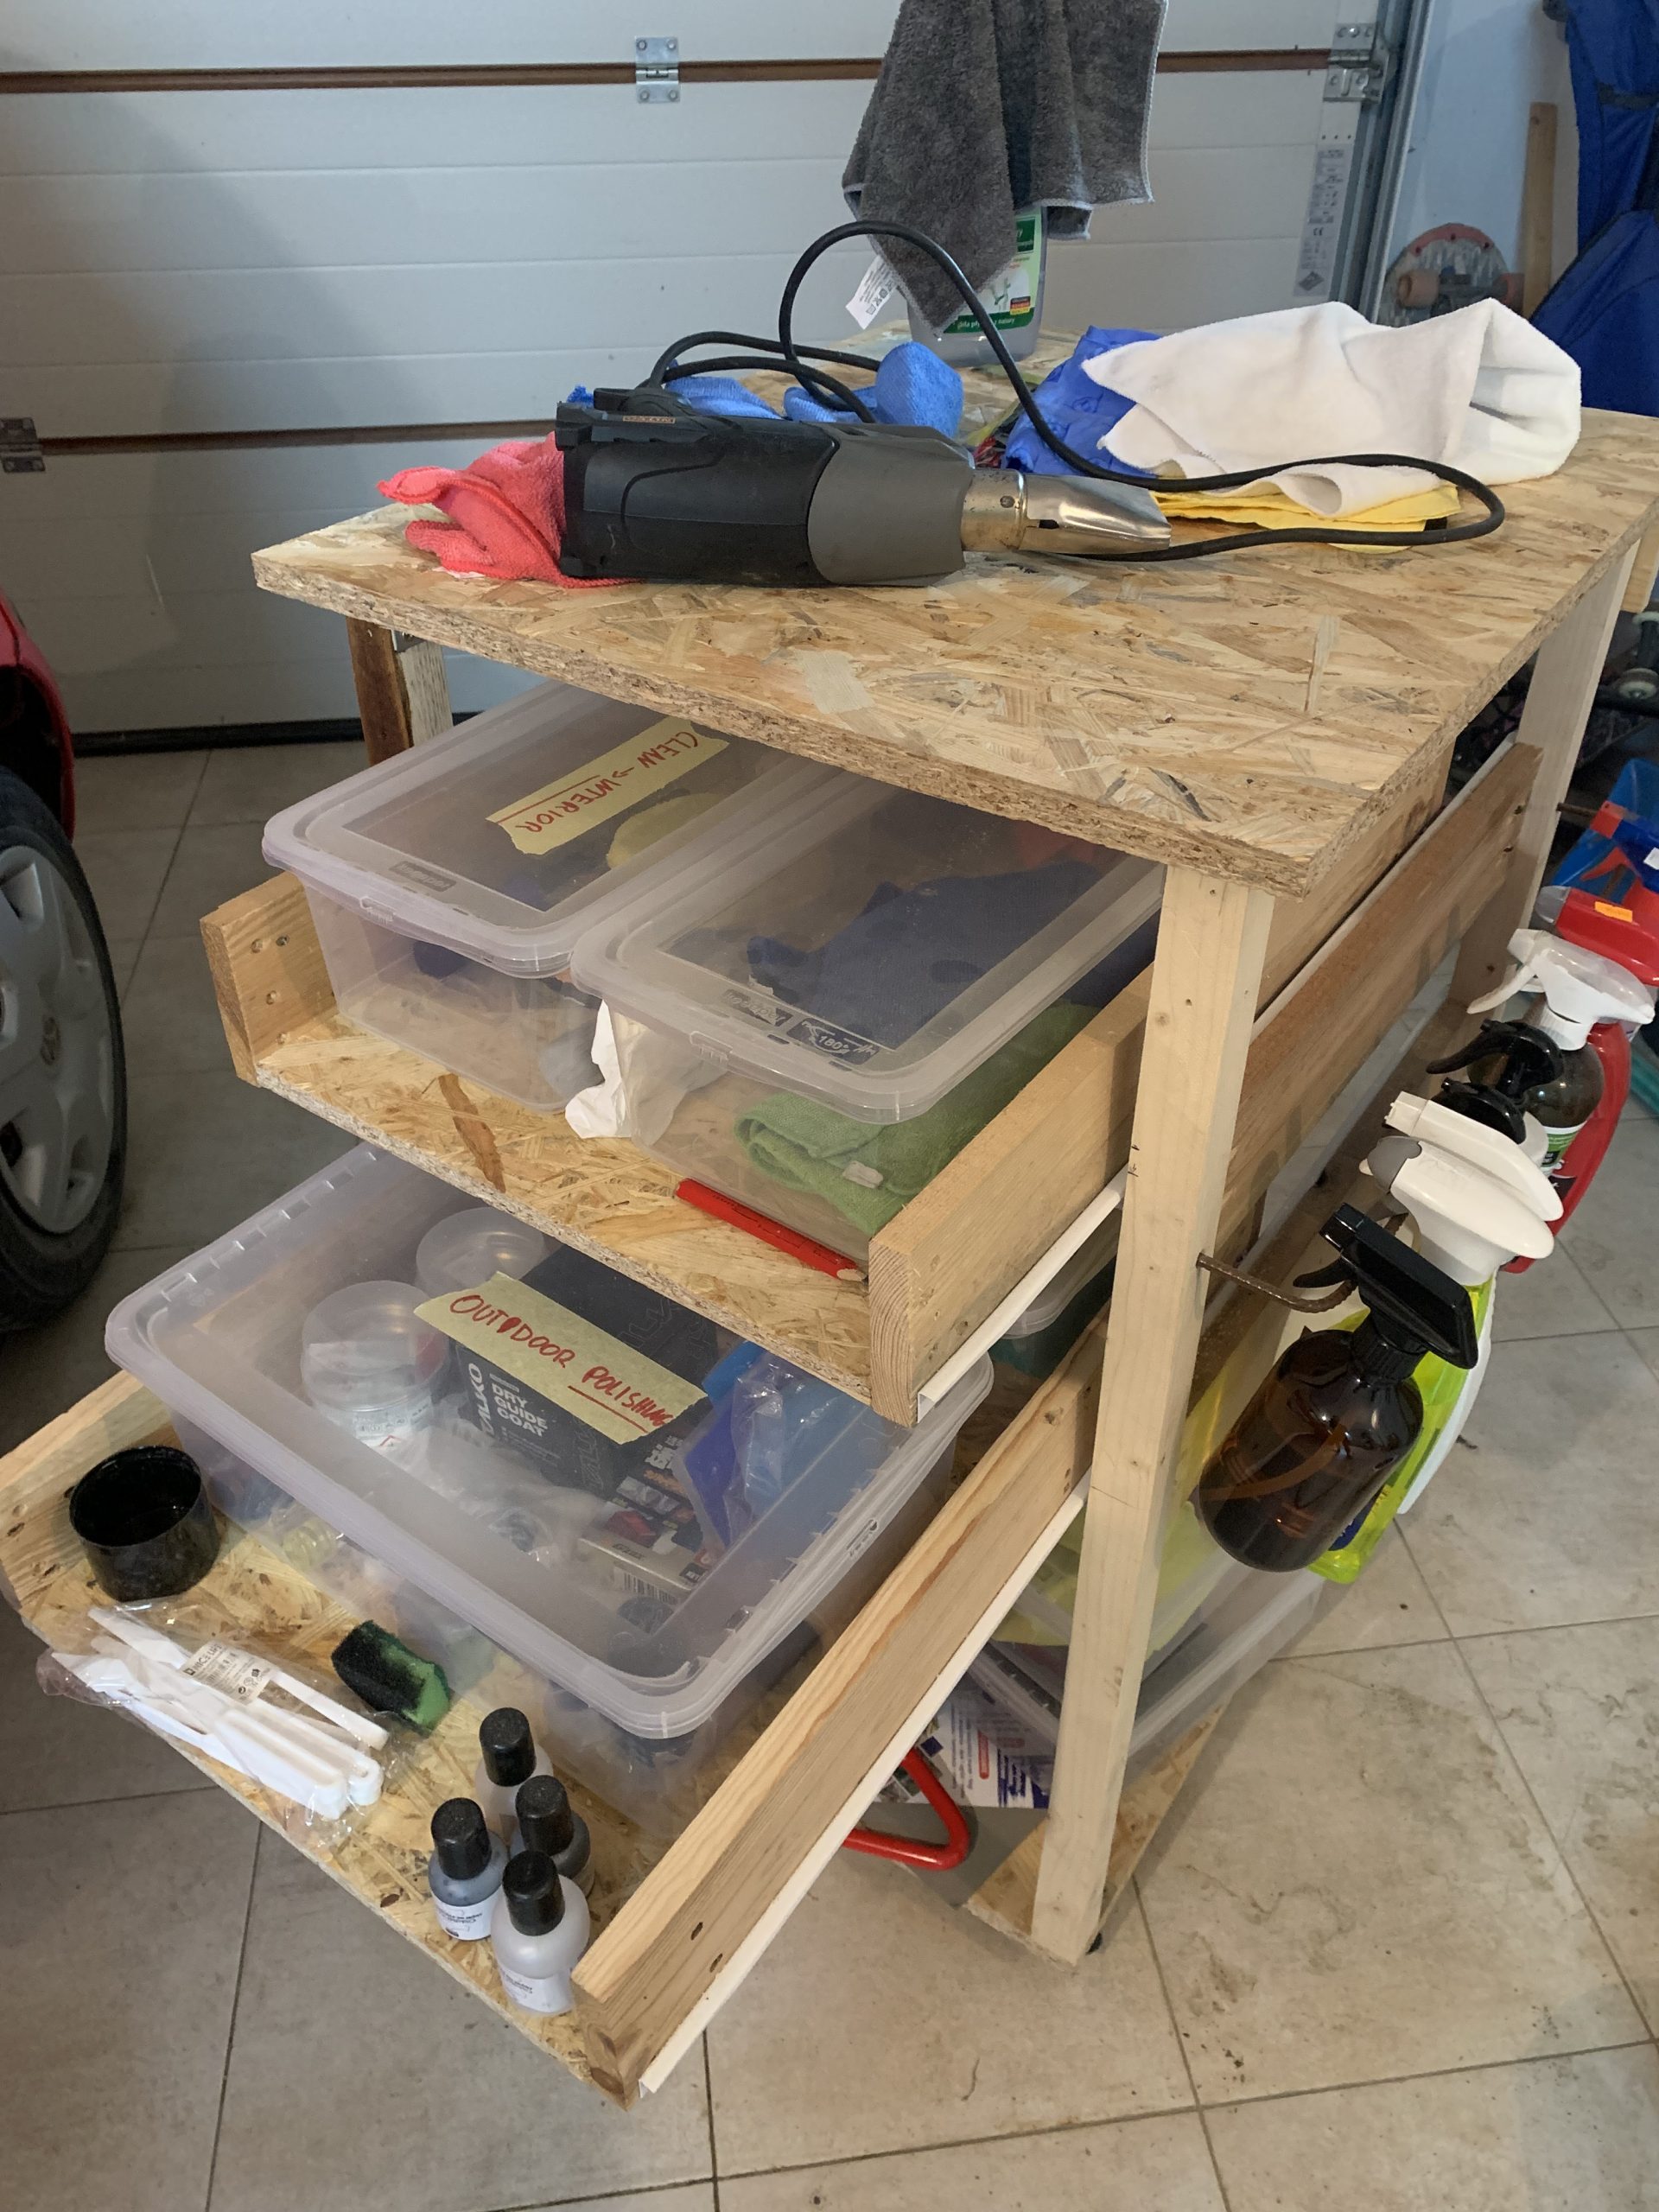
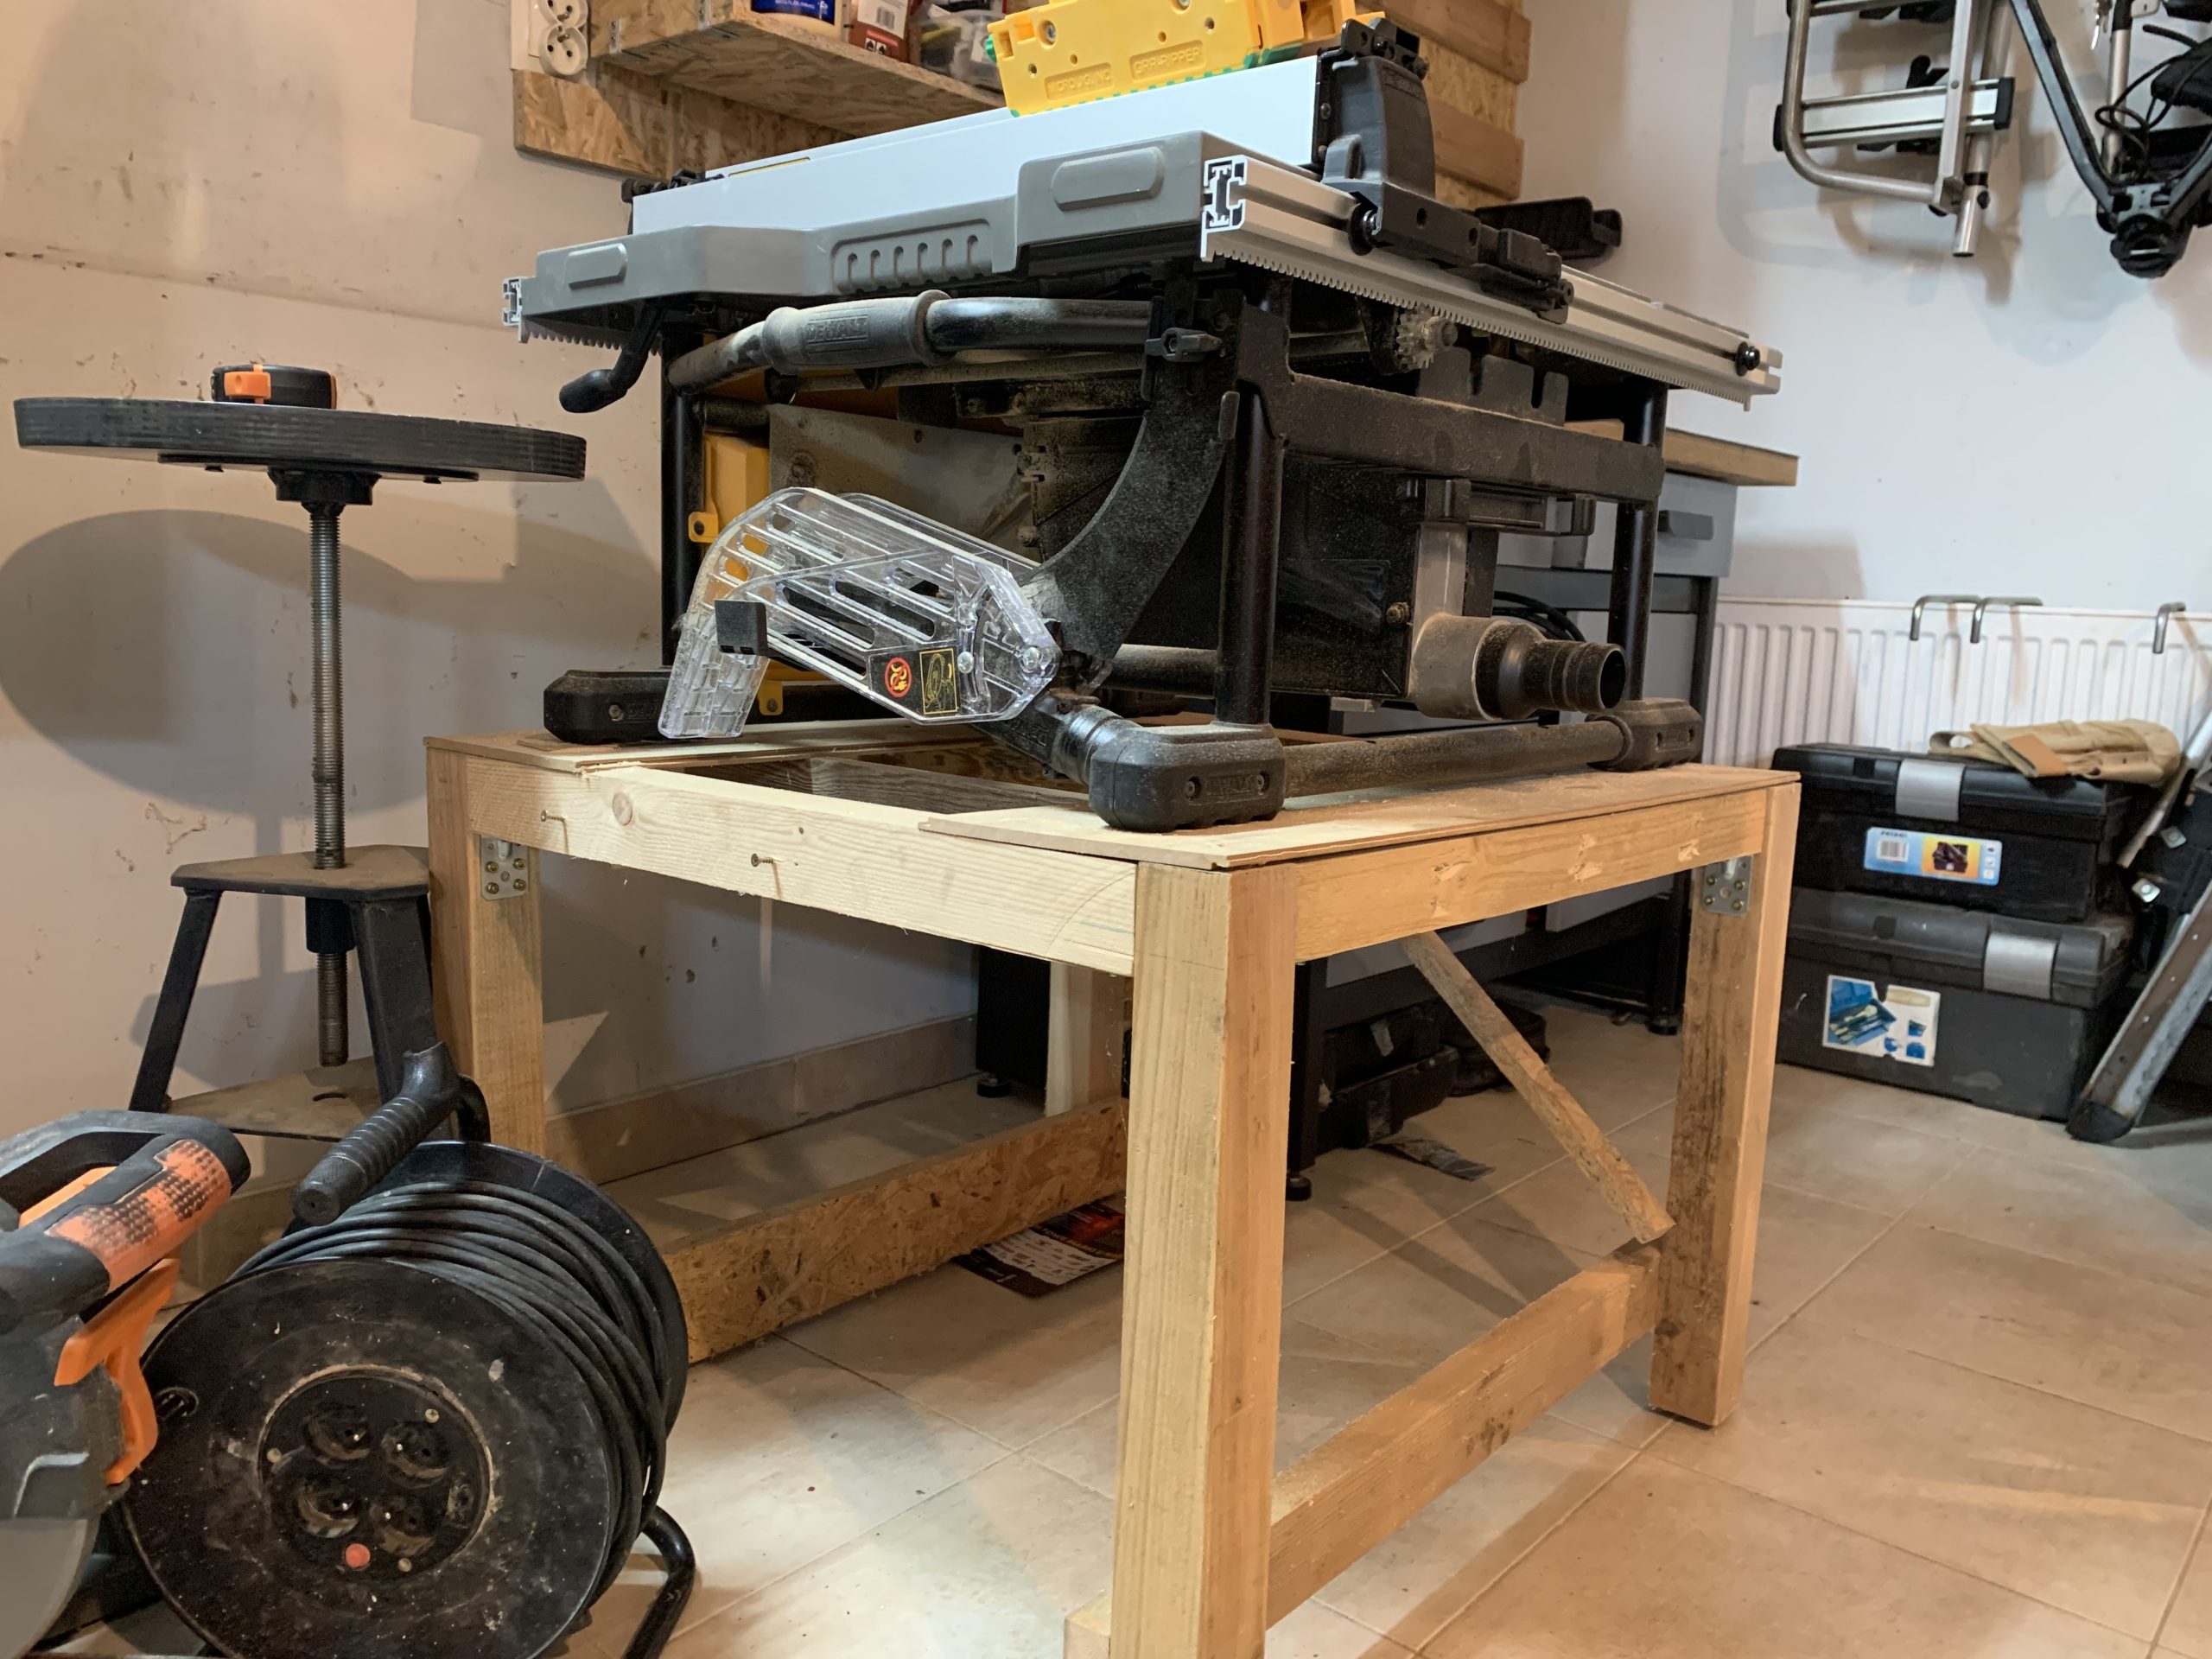
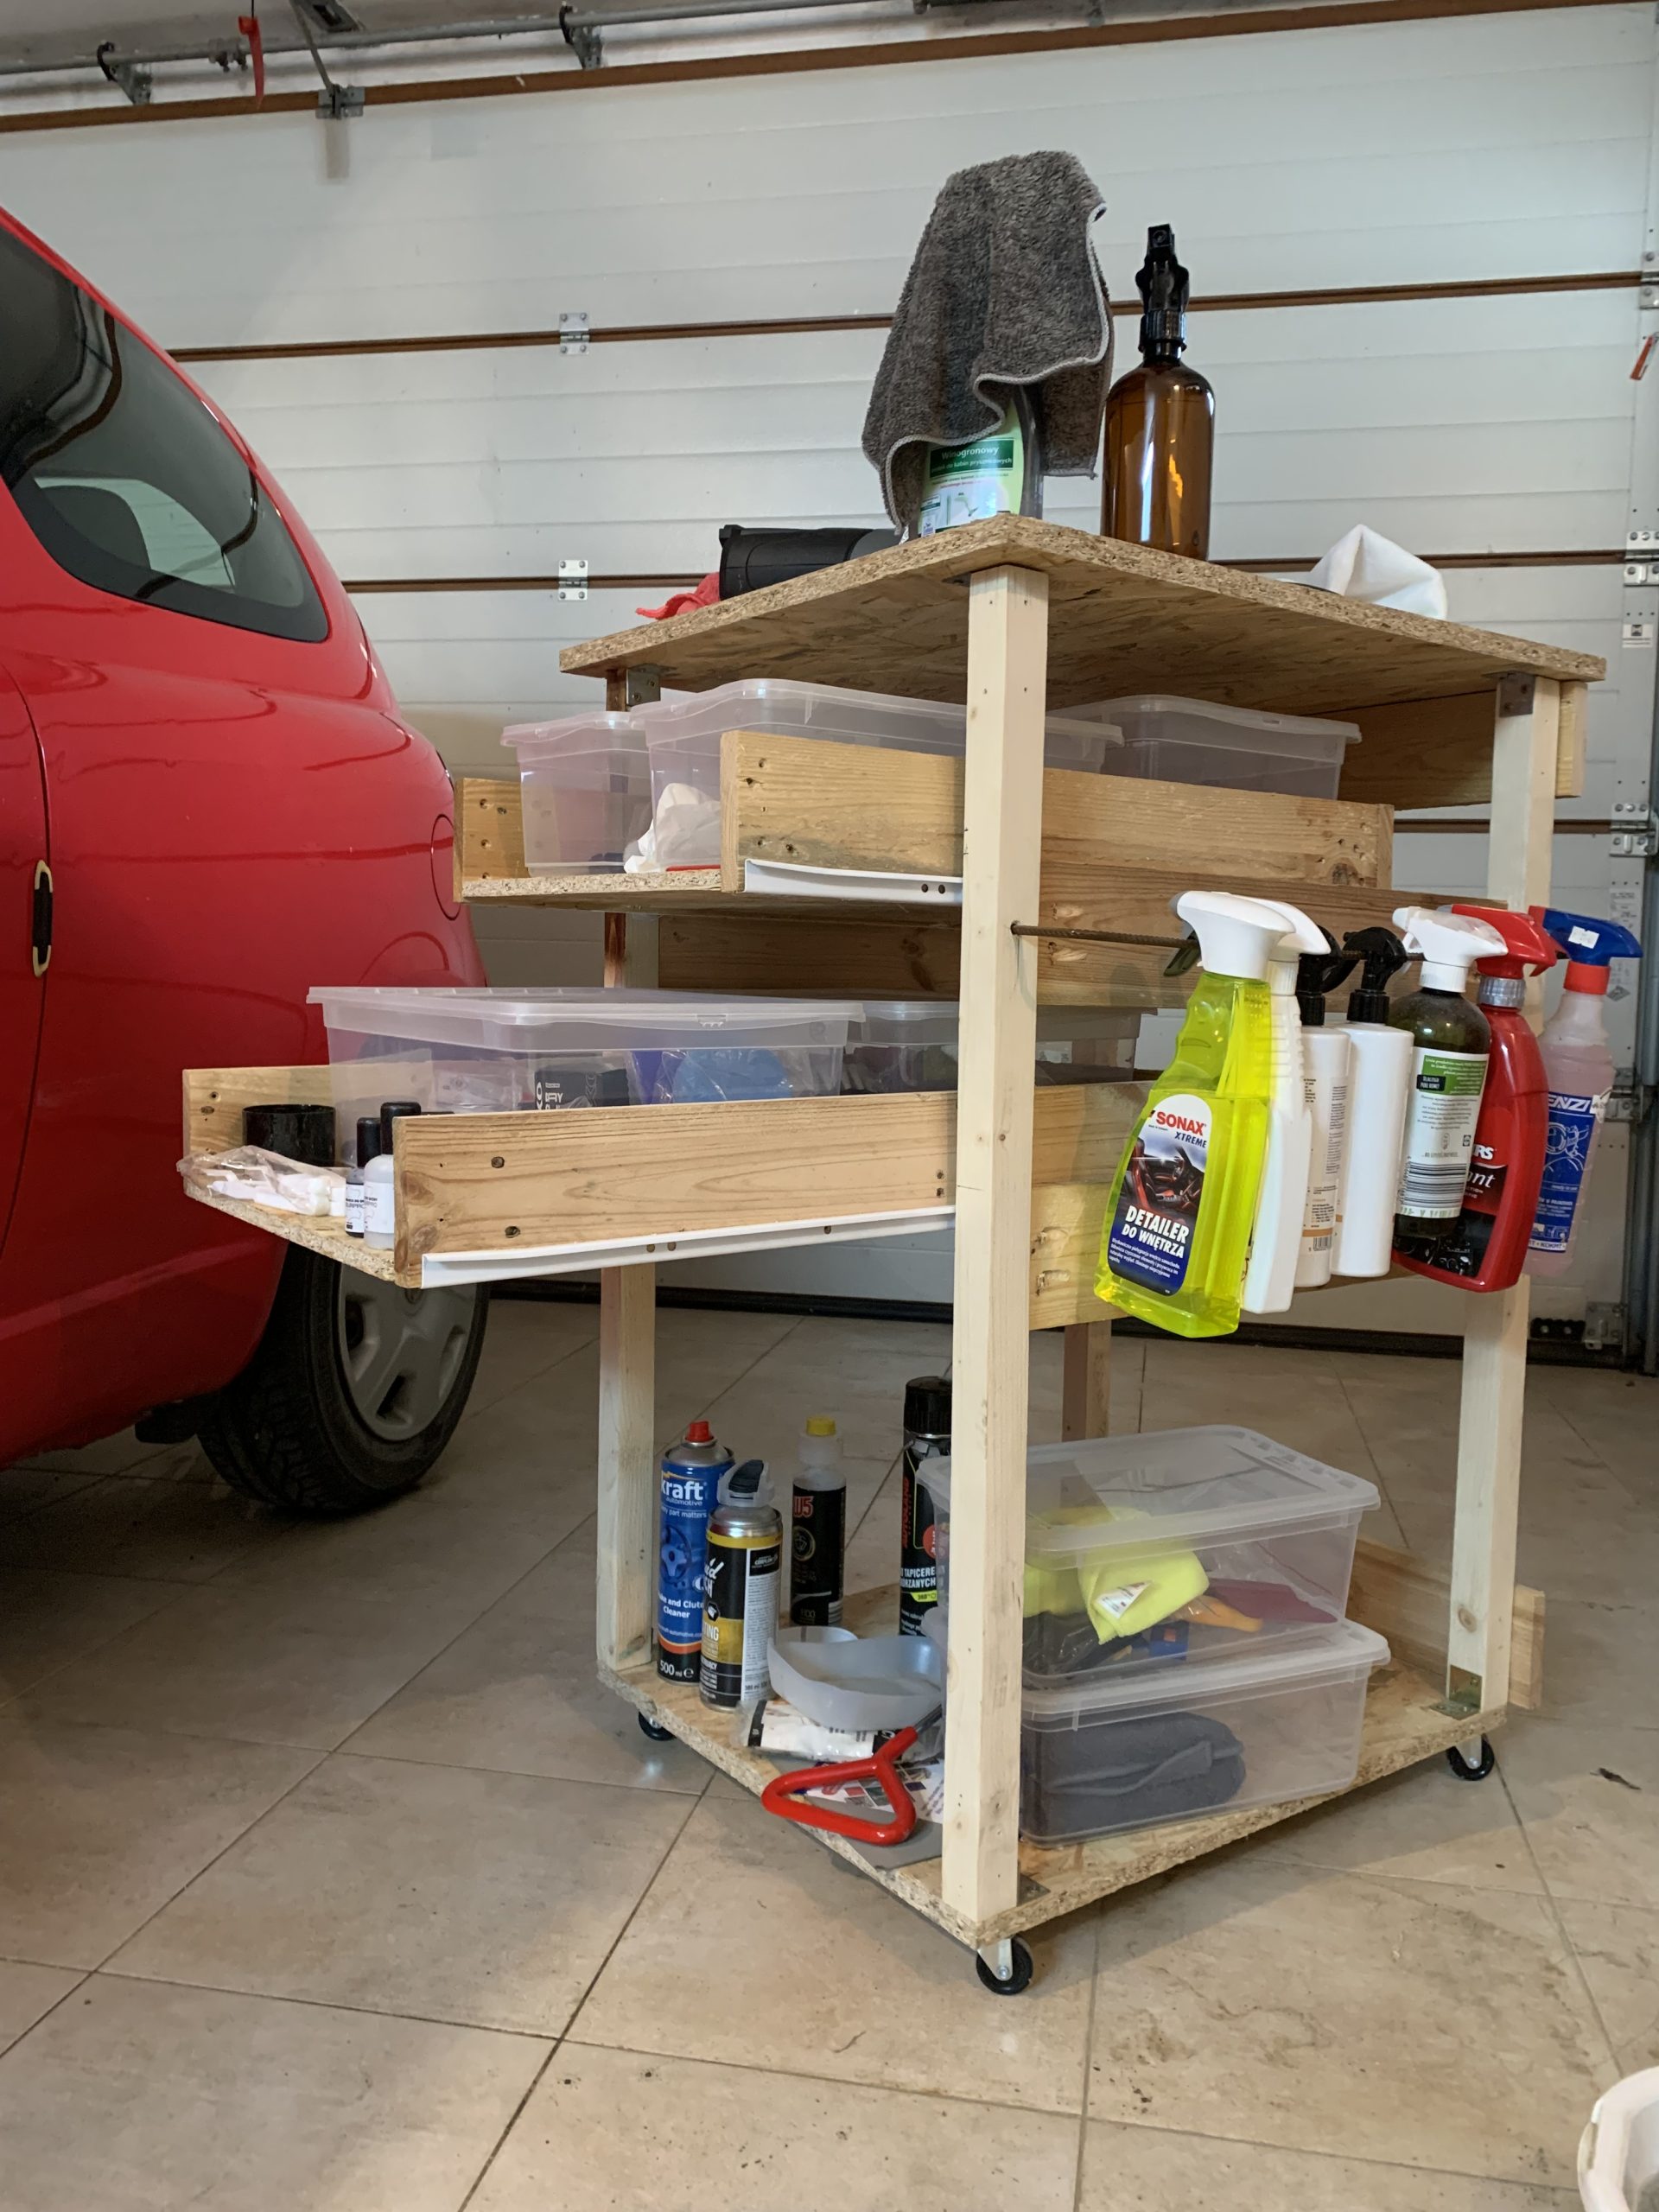
In order to learn the basics of woodworking while working on real projects that would help ne ogranize all the tools that I have, I decided to start from upgrading my garage. I built a ‘french cleat wall system‘ that allows me to hang my tools on the wall in different configurations. I designed different storage units, such as the shelf for all of my glues and tapes, circular saw and clamps holder, and sandpaper organizer. Then I build a small table for my table saw, and a wooden cart, that I use when I need to work outside of my garage e.x. repairing and cleaning my cars.
Mountain Shed
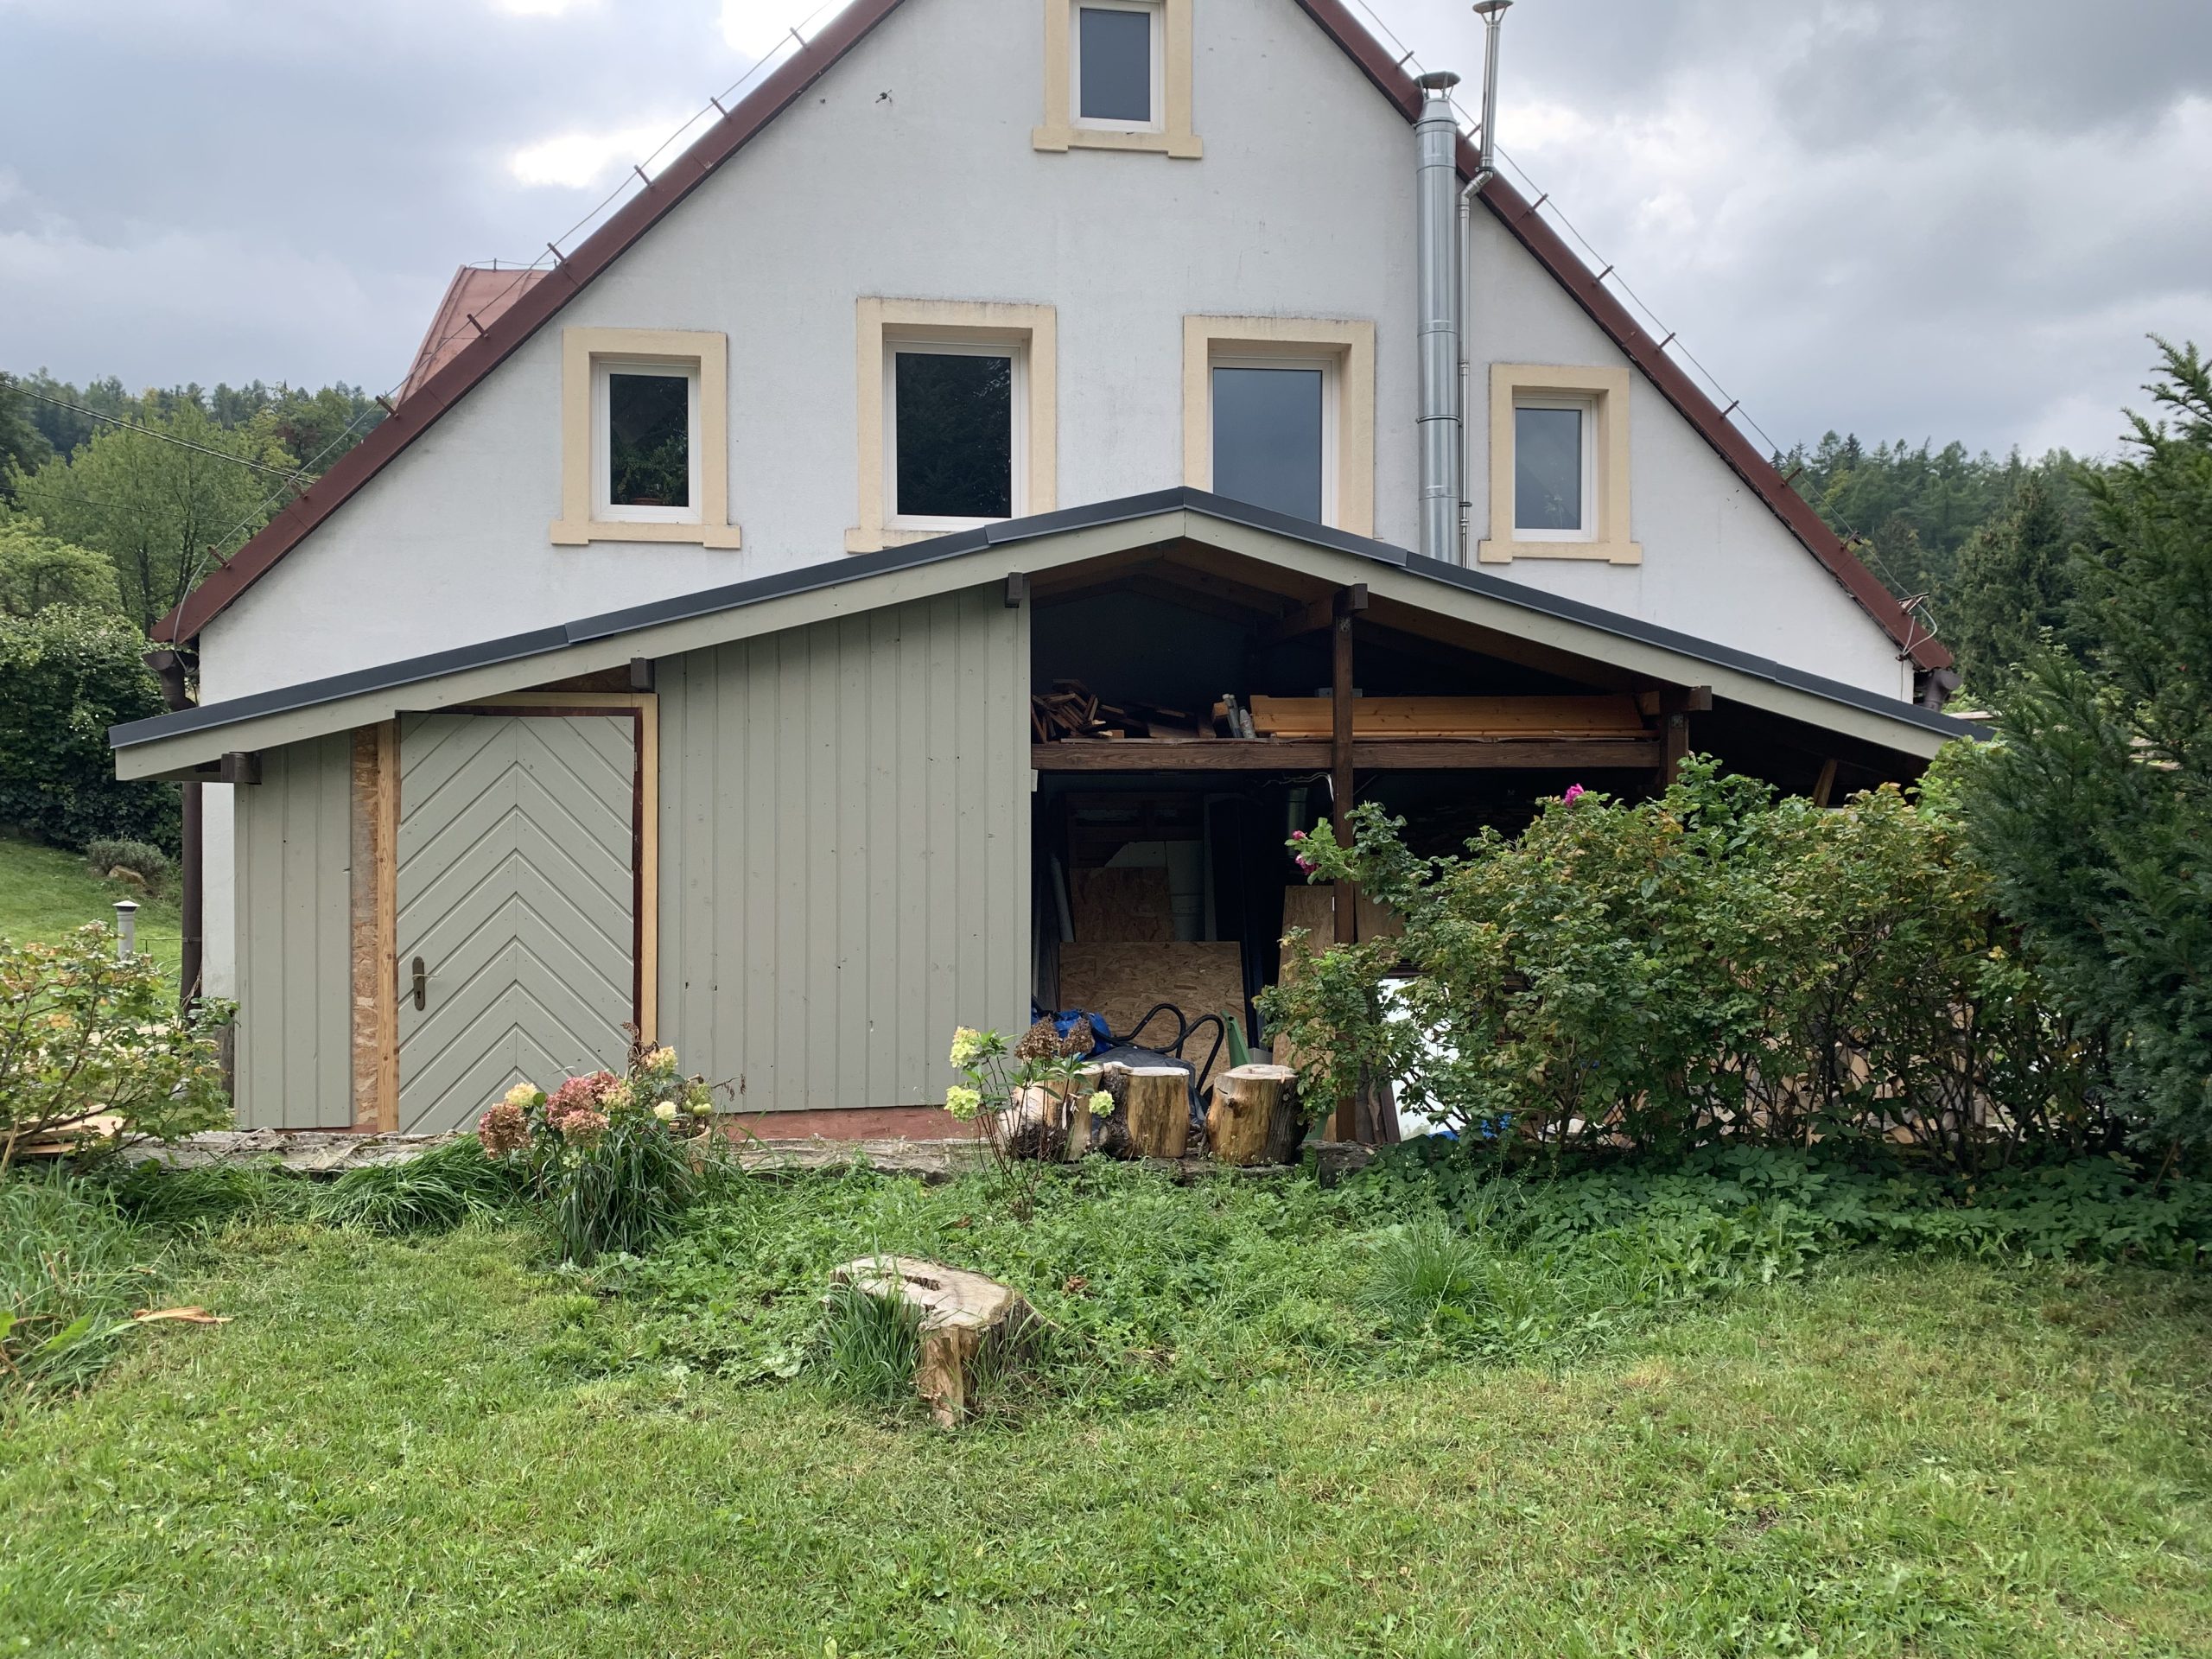
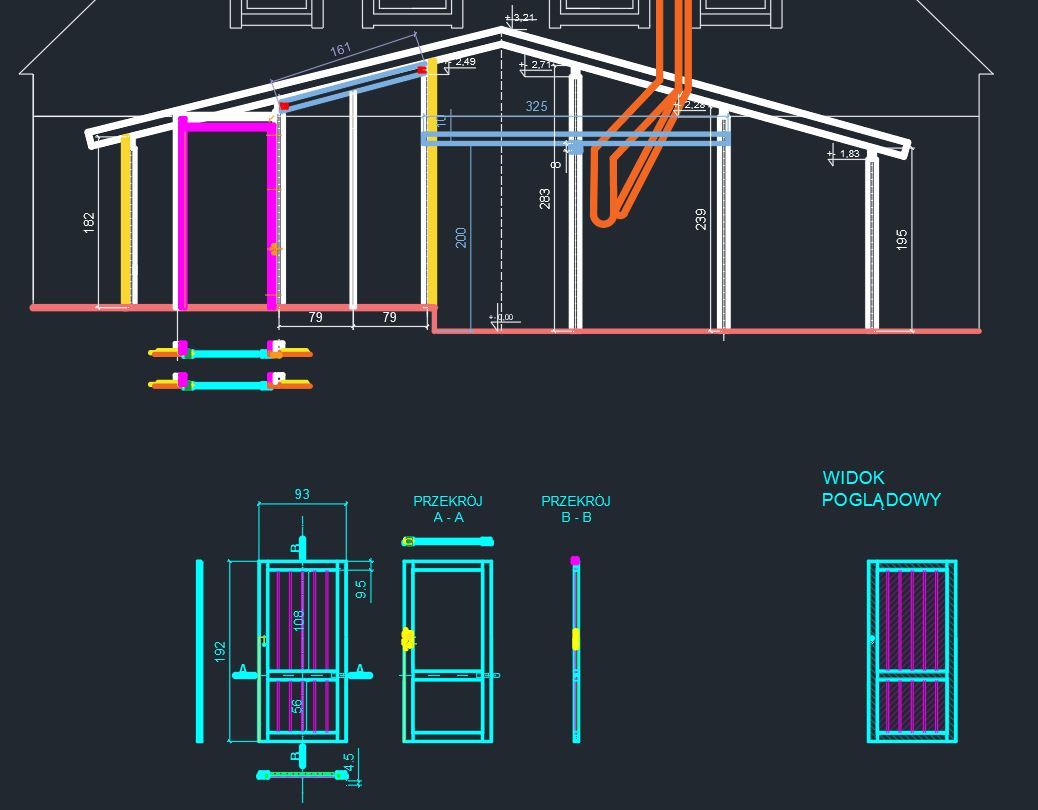
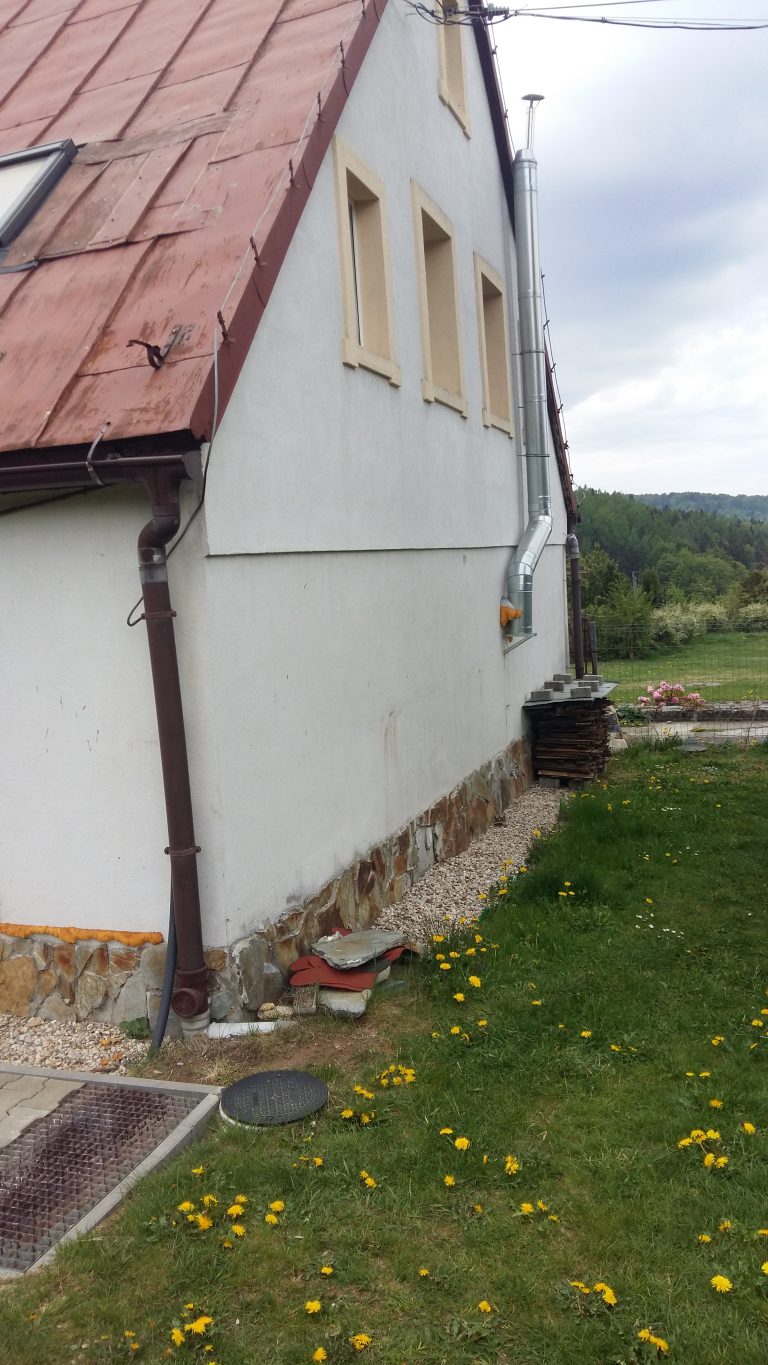
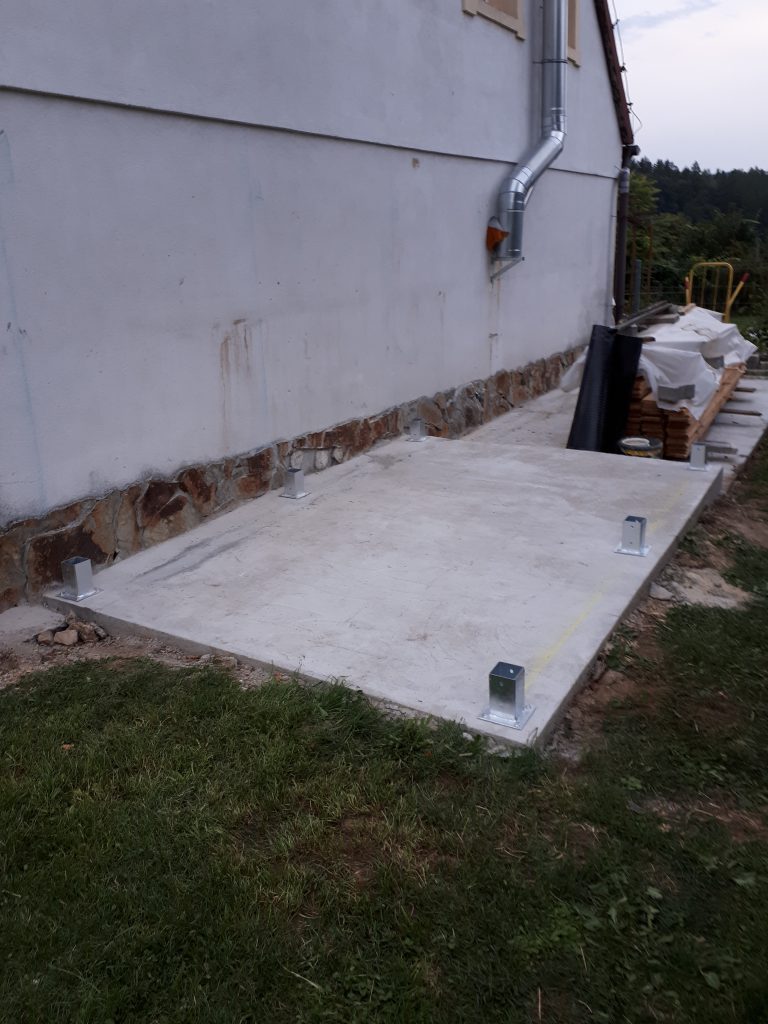
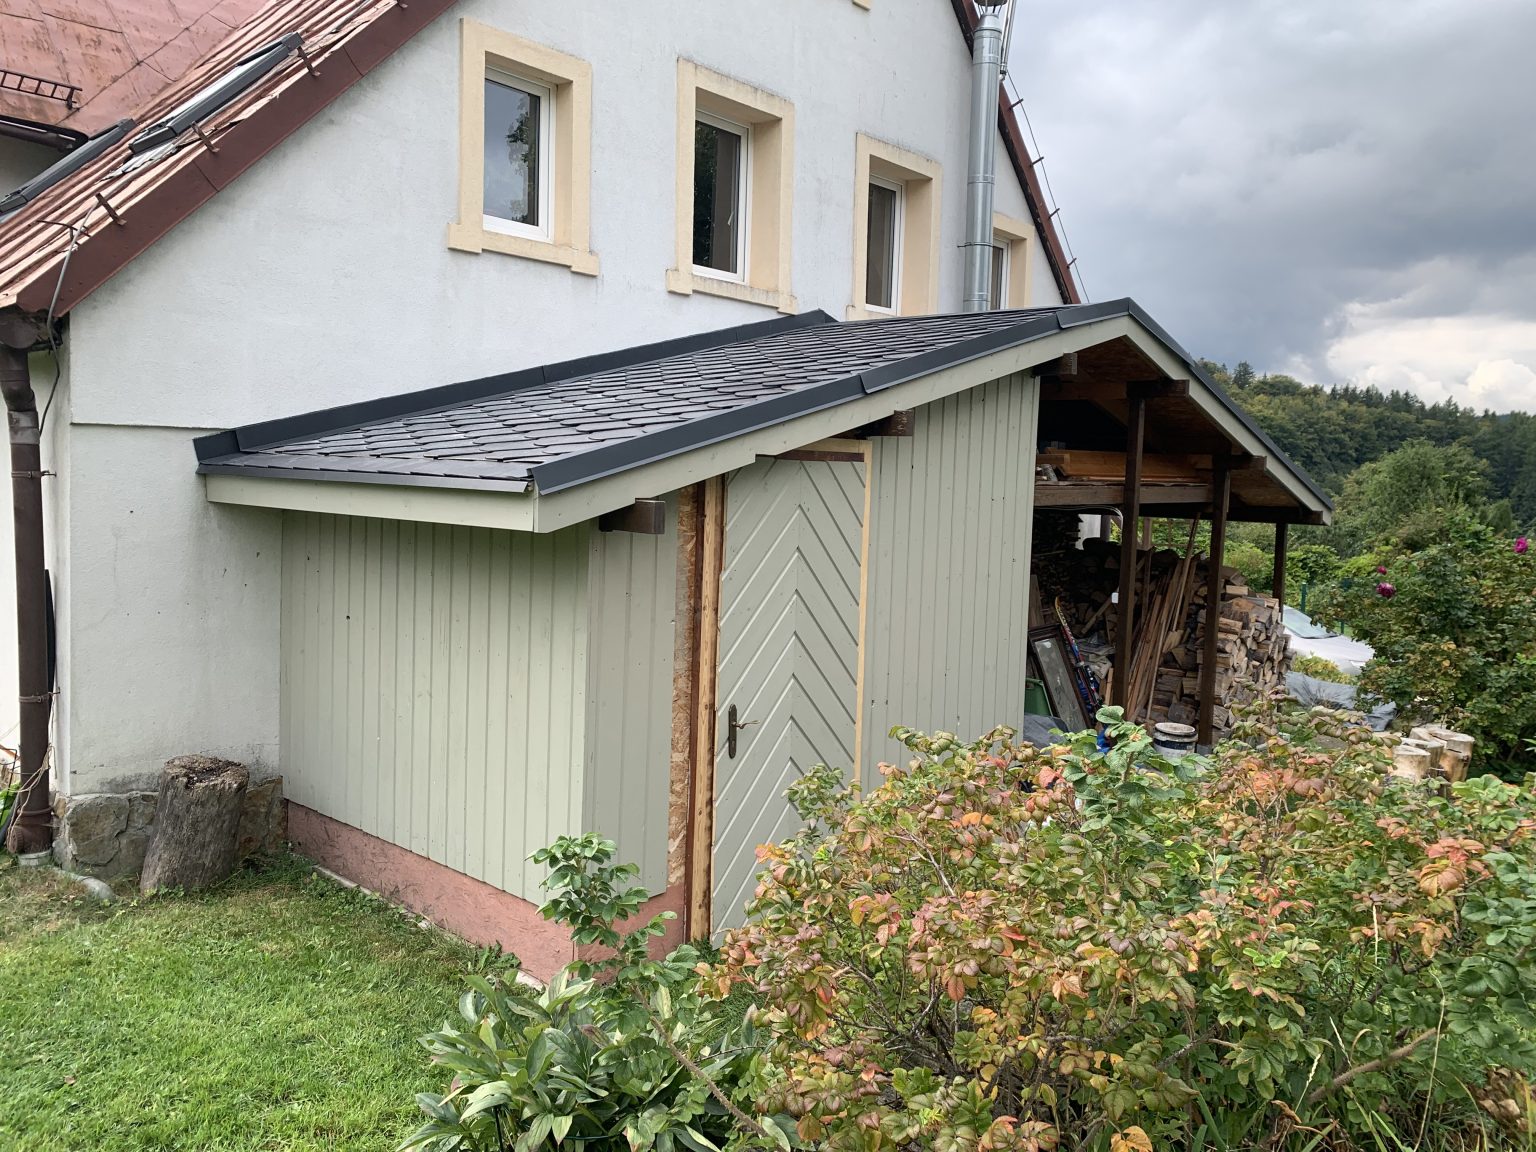
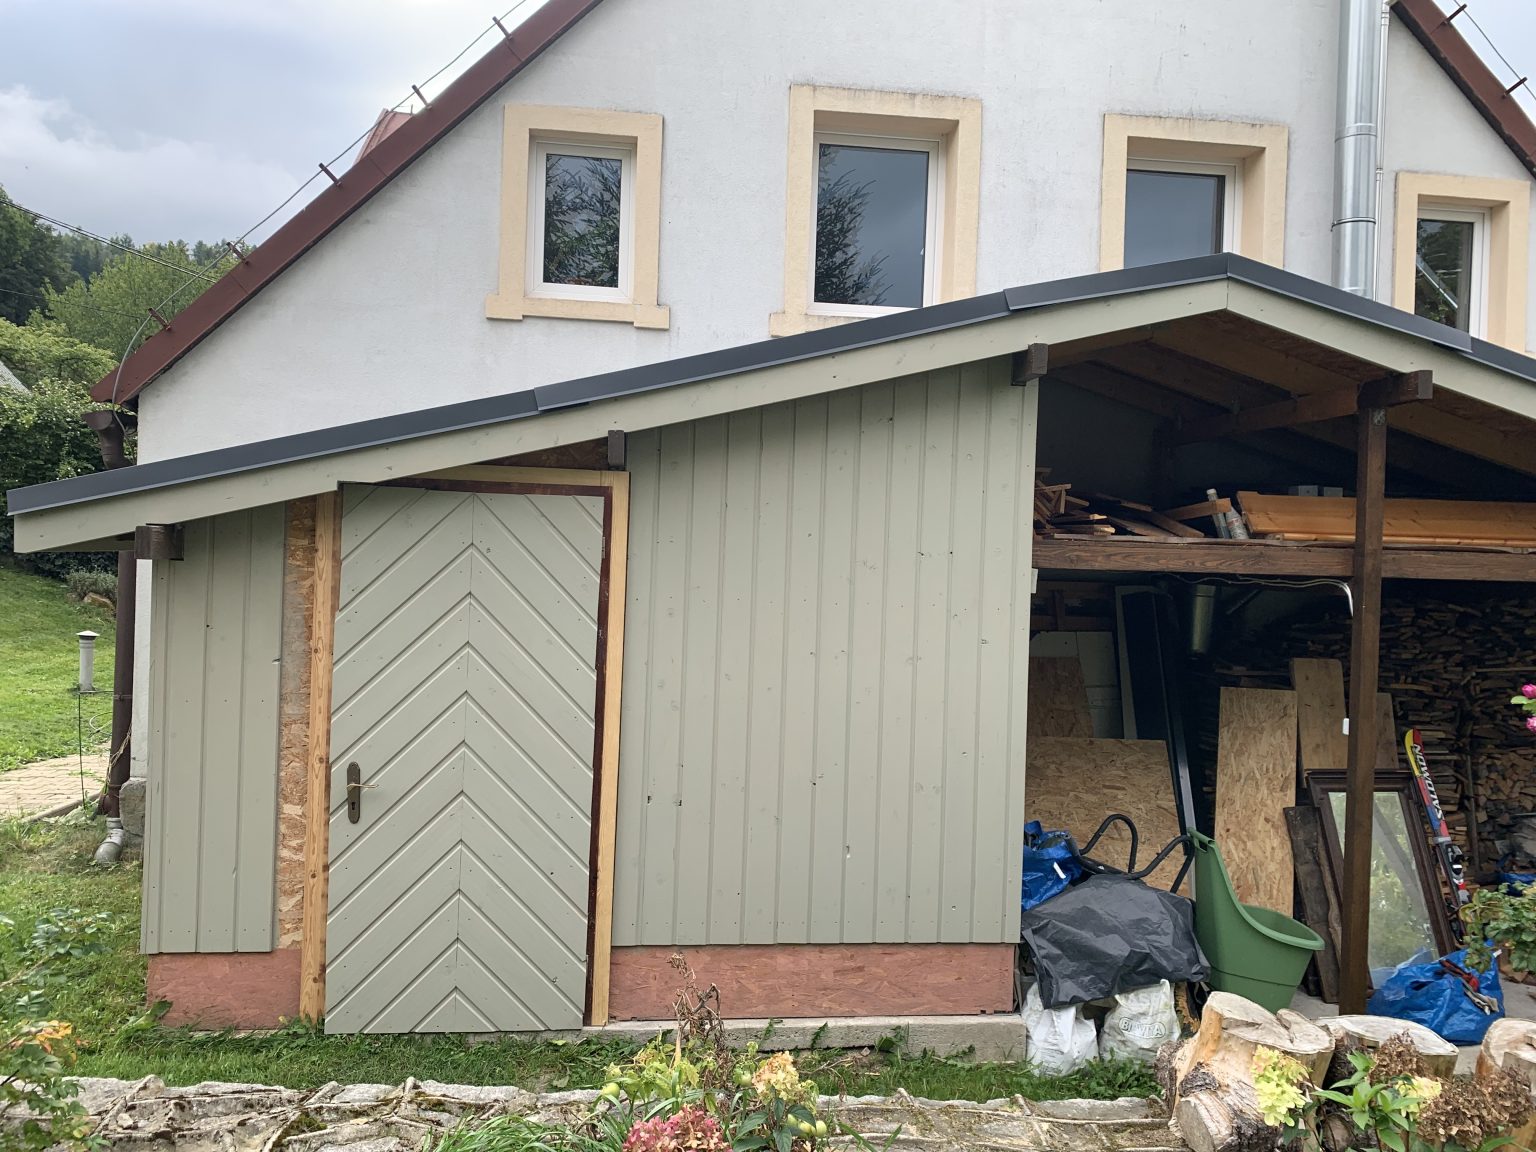
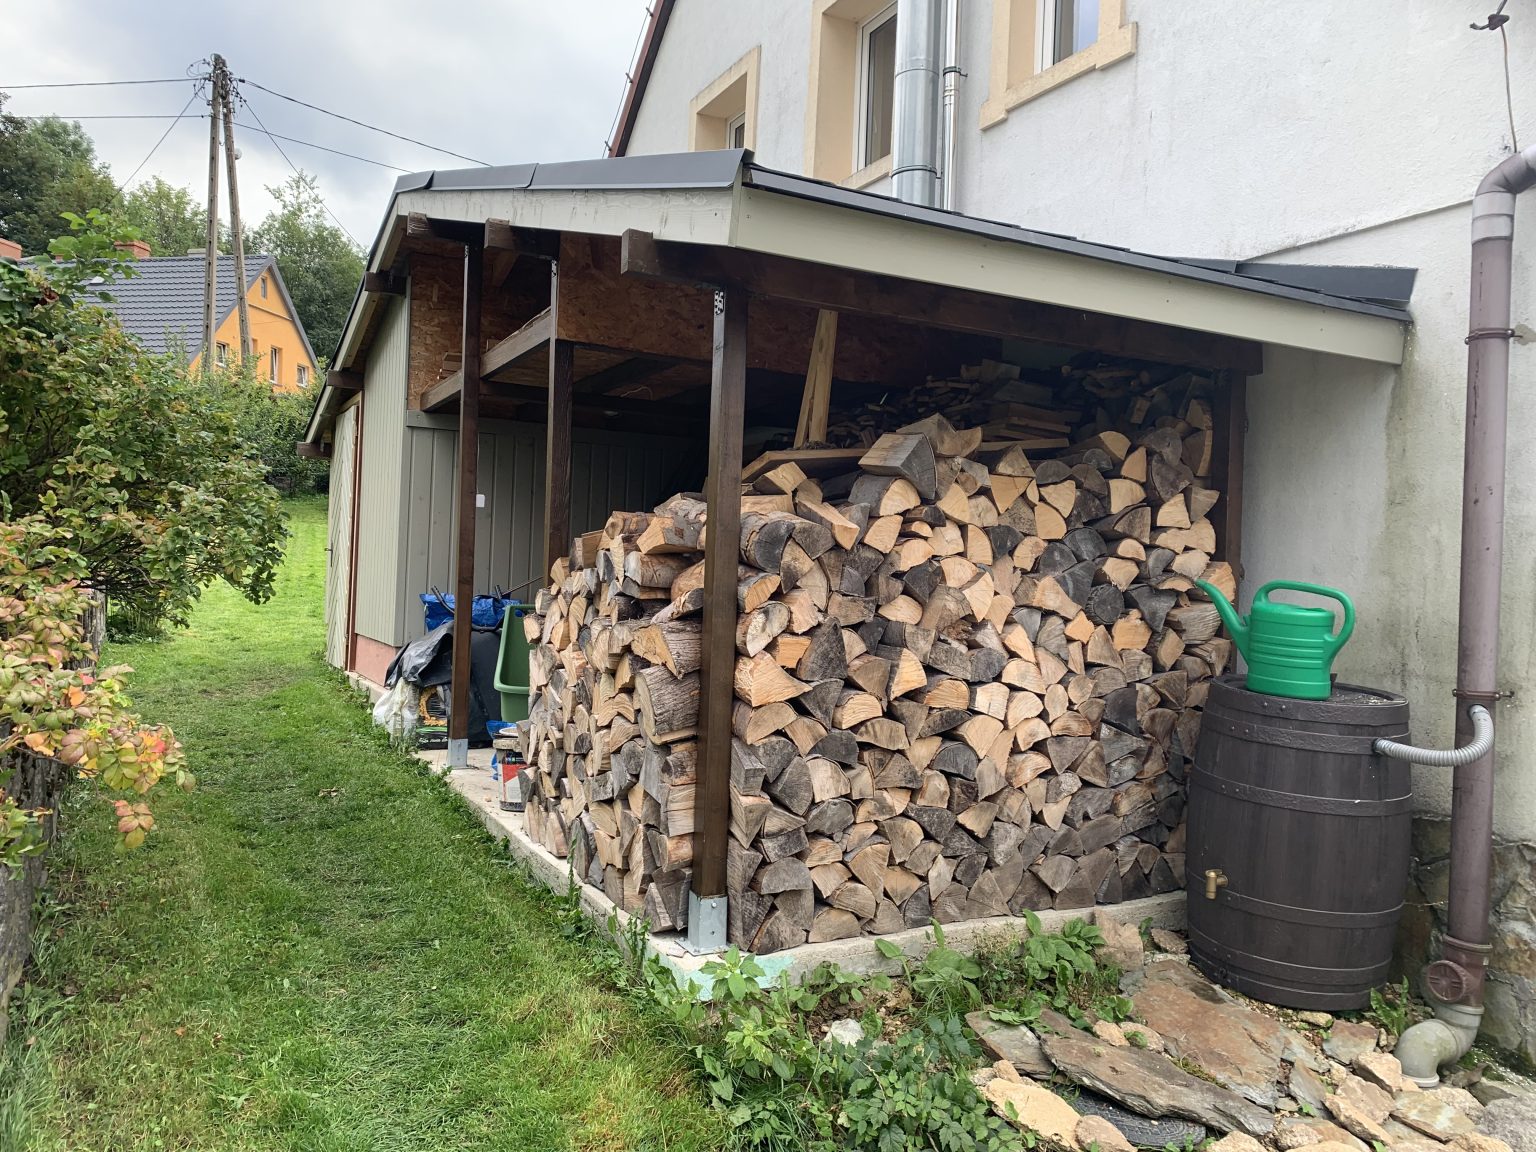
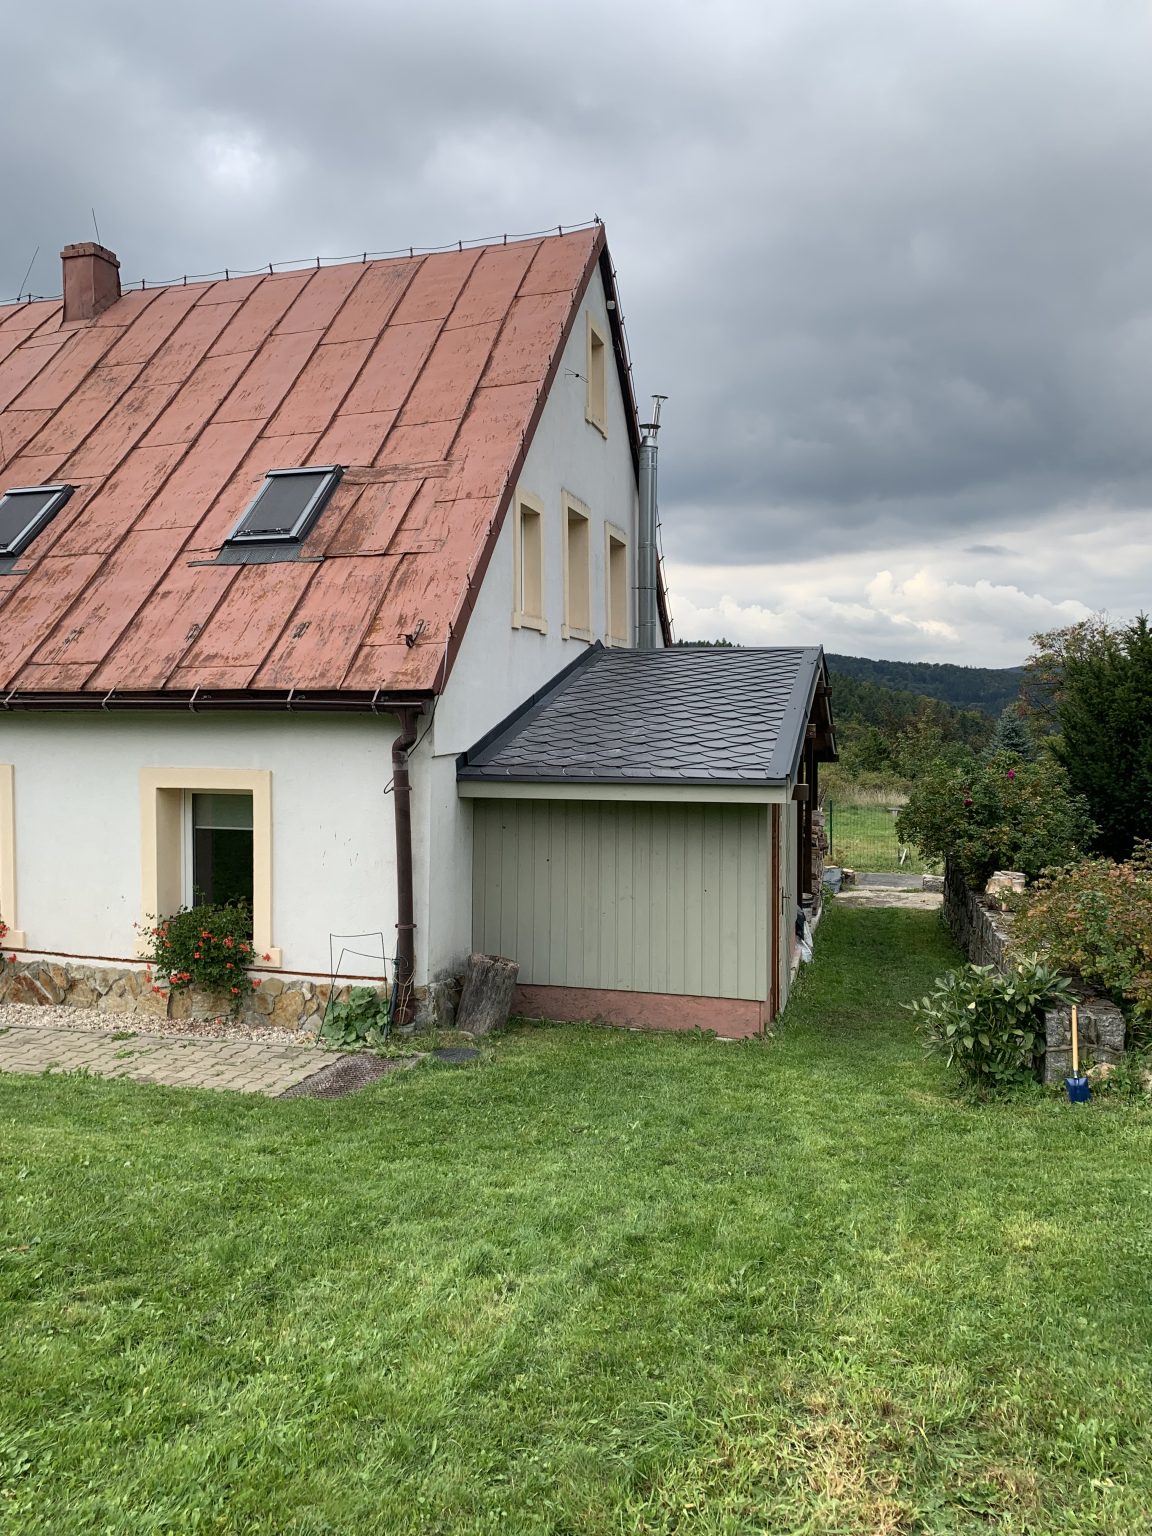
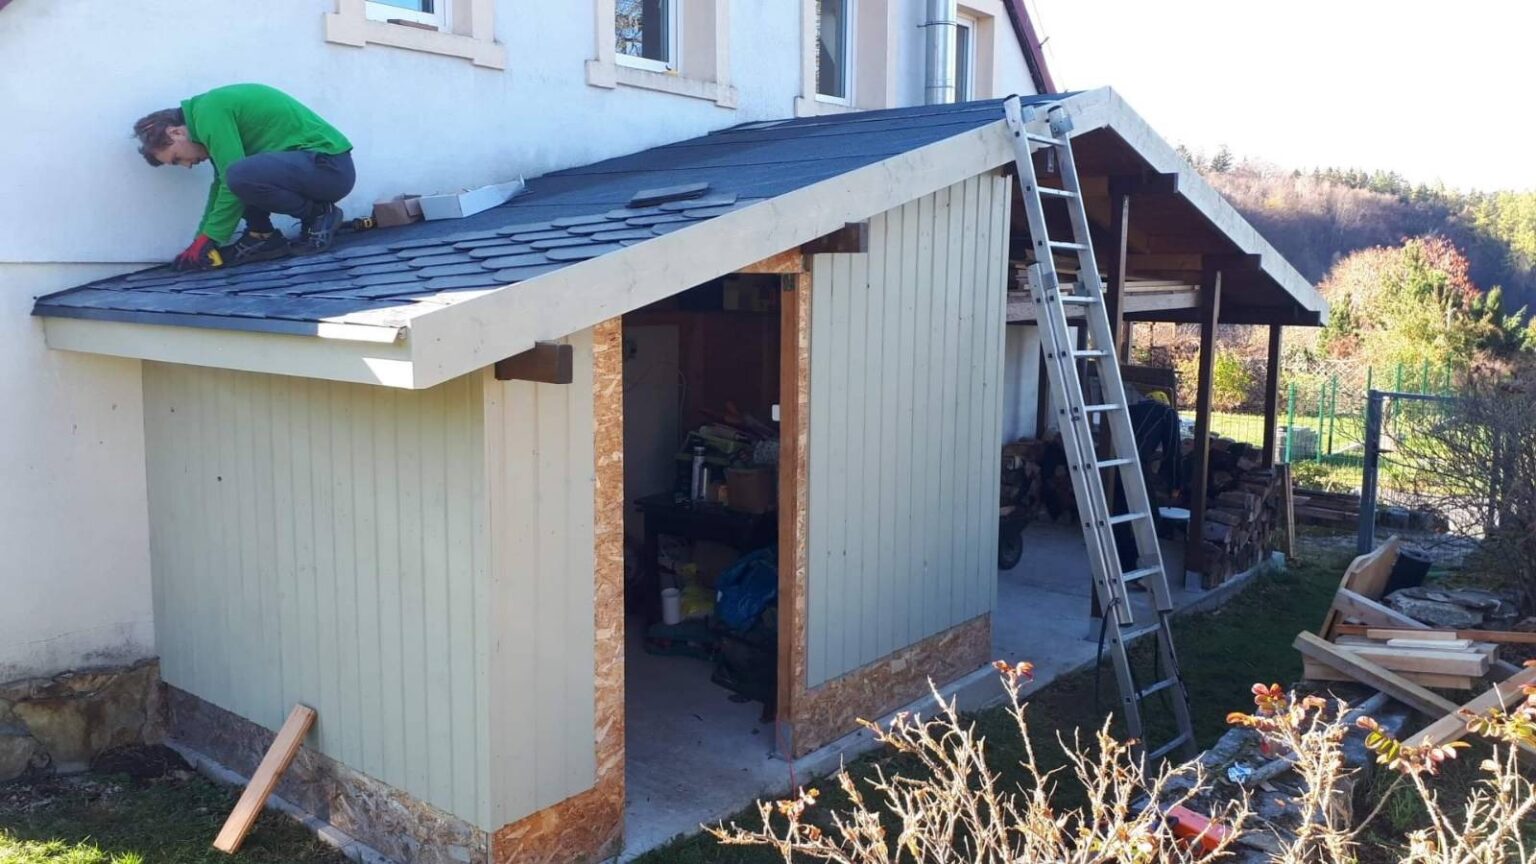
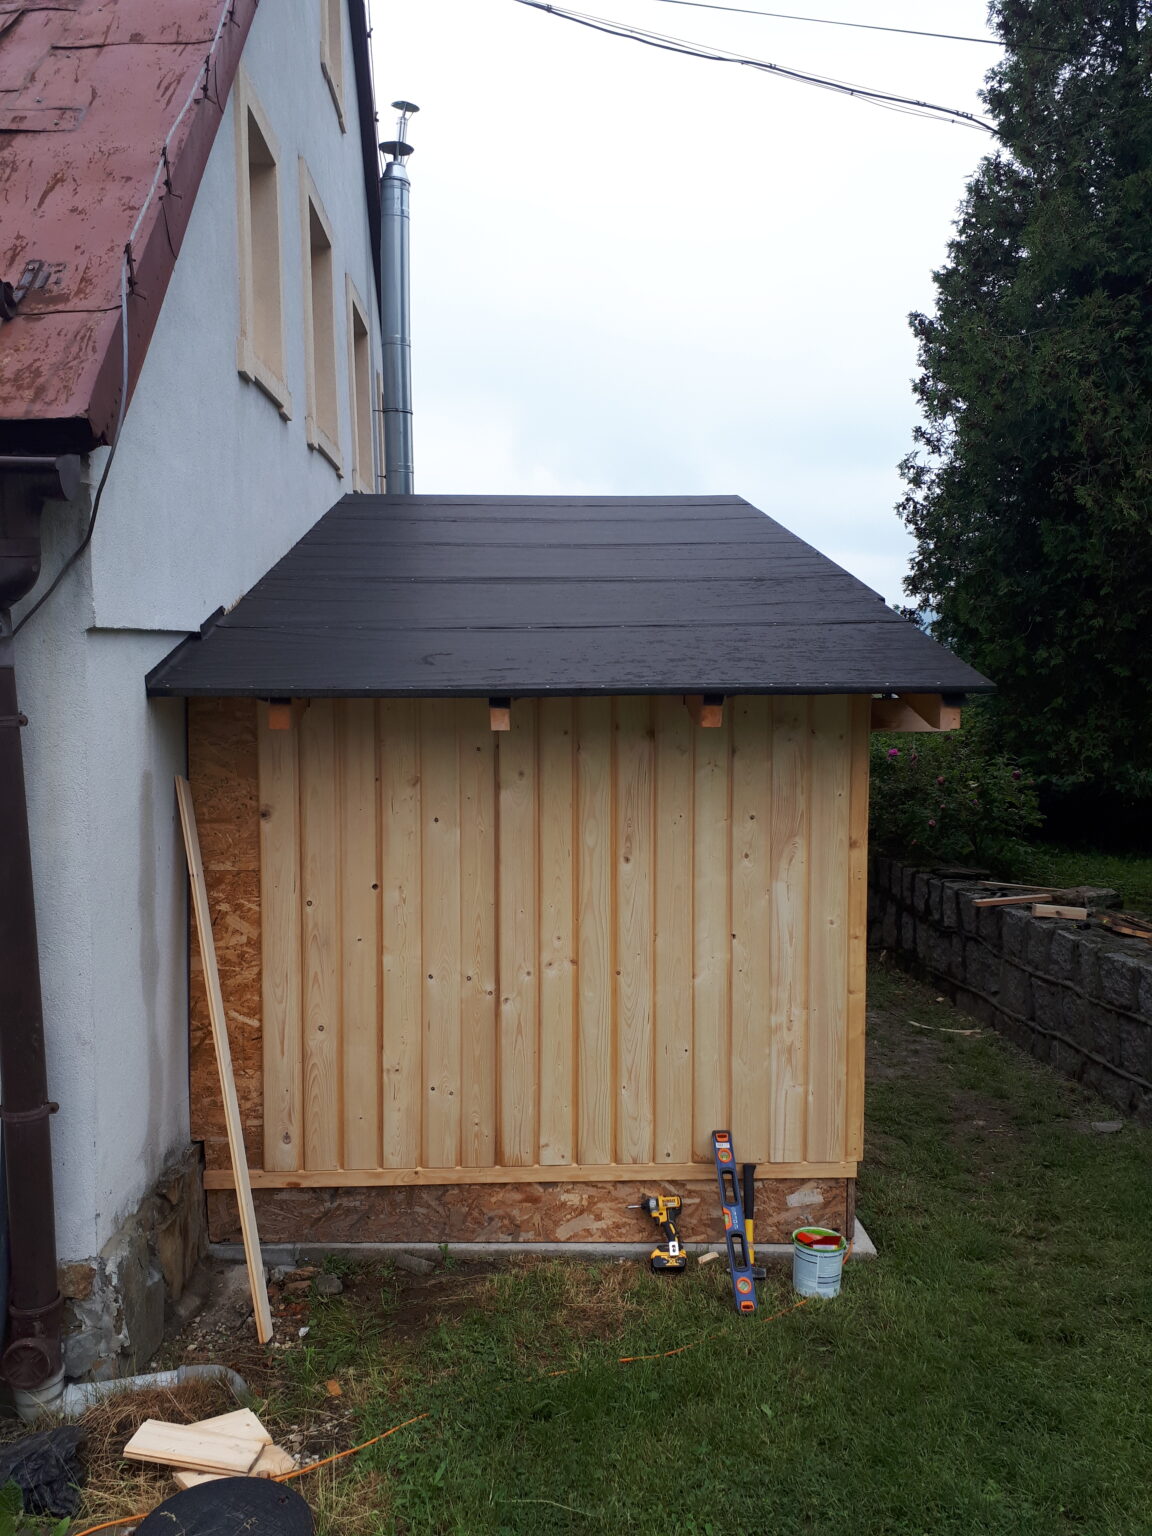
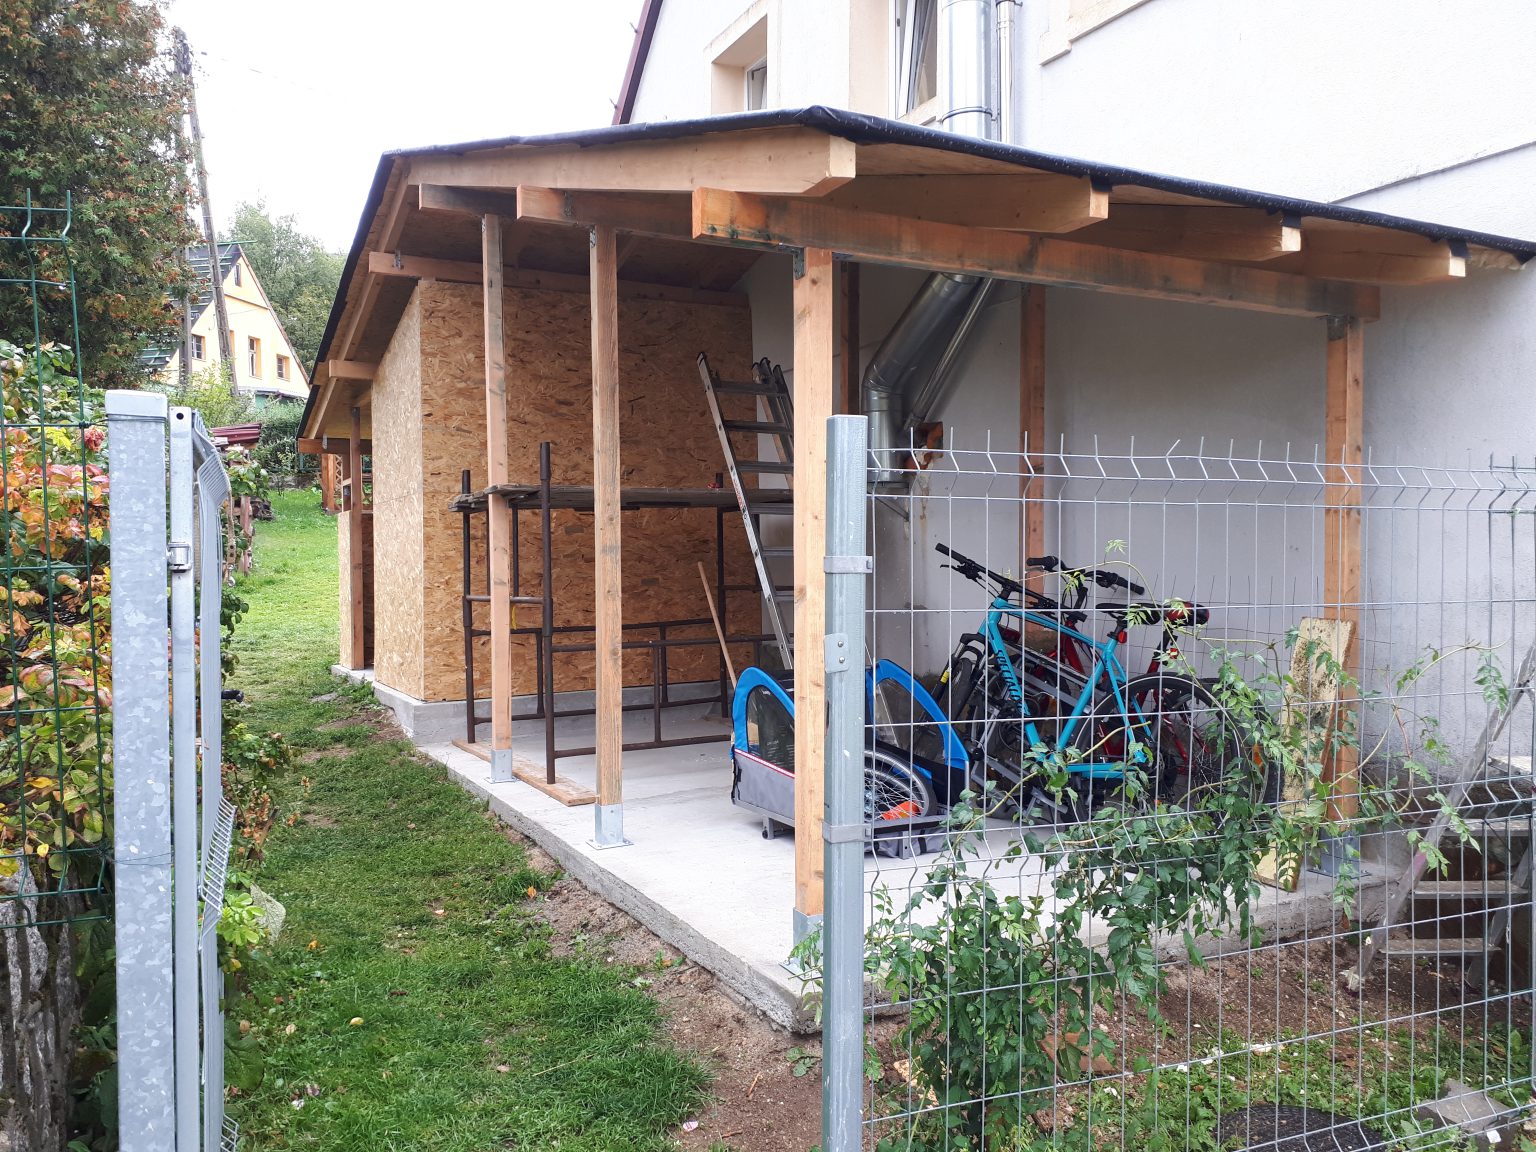
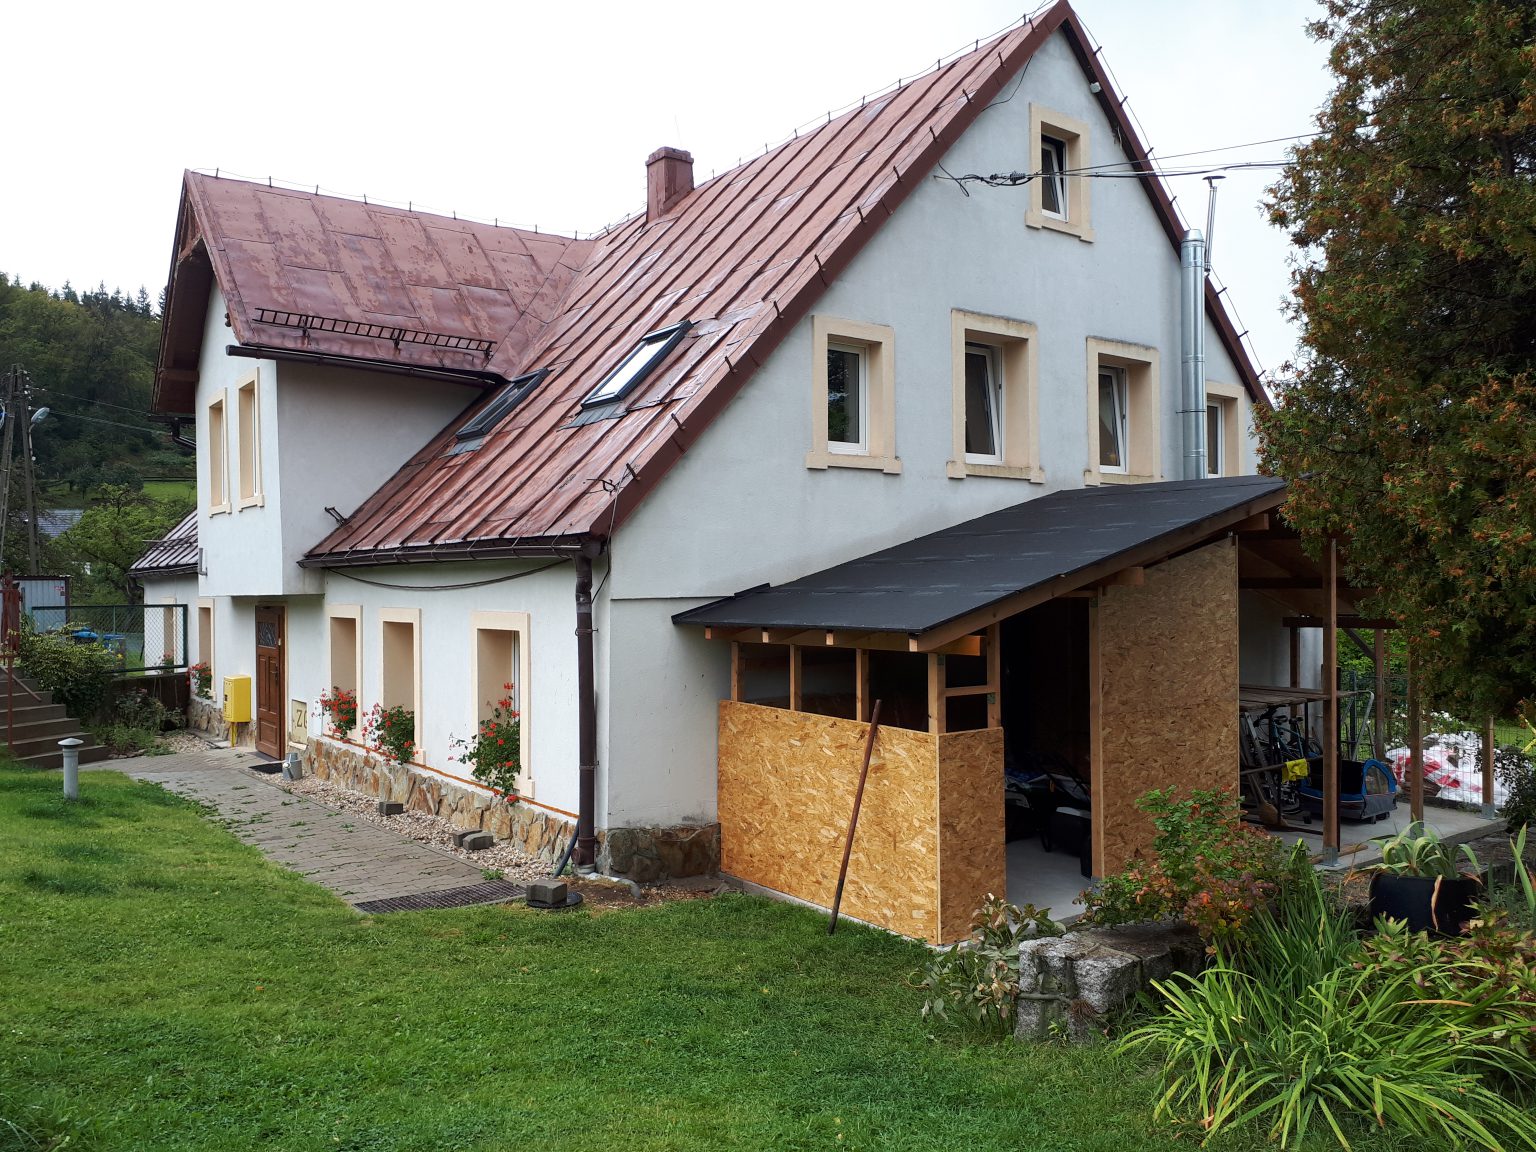
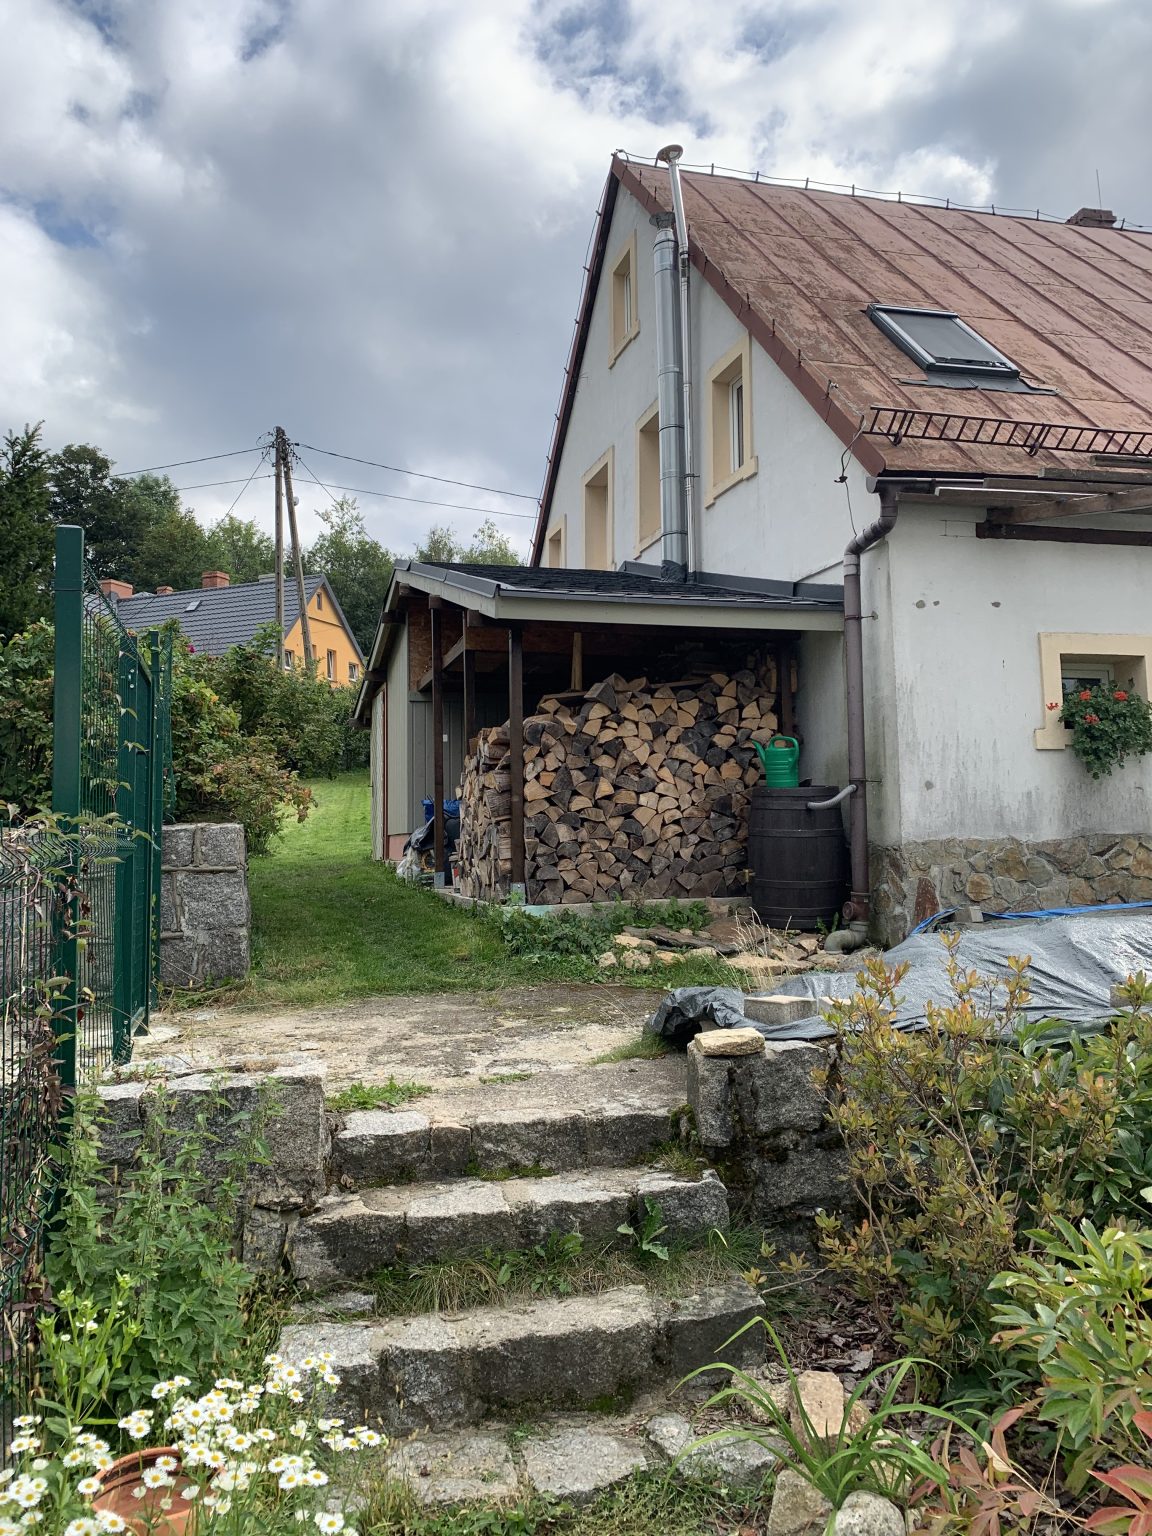
In summer of 2020 I decided to design and build a shed for my aunt. This shed was meant to be a substitute for the garage and storage room, because my aunt doesn’t have one and she lacks a place to store garden gear, furniture, tools, and firewood. My aunt lives in the mountains so this building had to be sturdy and resistant to strong winds. Because this shed was intended to integrate with the house I decided to design a roof similar to that of the original house. The biggest problem with this project was the ground declination. I had to make a two-step concrete slab to reduce the difference between the ground height at the beginning and the end of the floor.
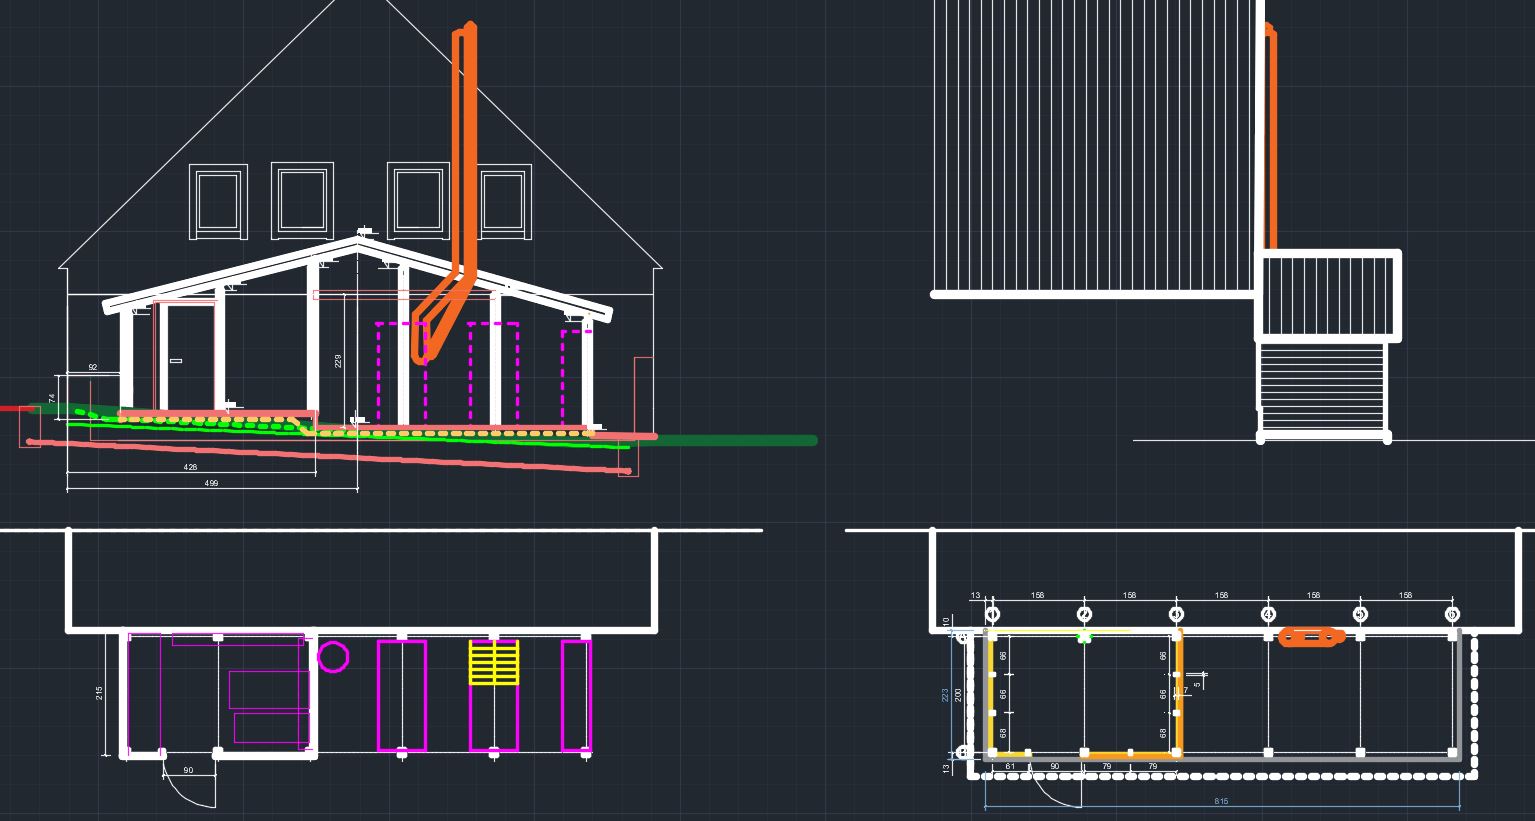
The blueprint of this project is available in PDF and in the “Technical Drawings” section
Steps
First I had to prepare area for construction . I got rid of grass and stones and dug a hole for the foundation.
Then I had to make a mold for pouring concrete in there. I didn’t have any rigid boards so I had to improvise. I cut OSB into 20cm wide and 2.5m long pieces.
Then I poured a concrete slab and formed two steps to reduce the terrain declination.
I had to wait few weeks for concrete to cure and not until then I could bolt metal braces to it. These braces would hold walls to the ground.
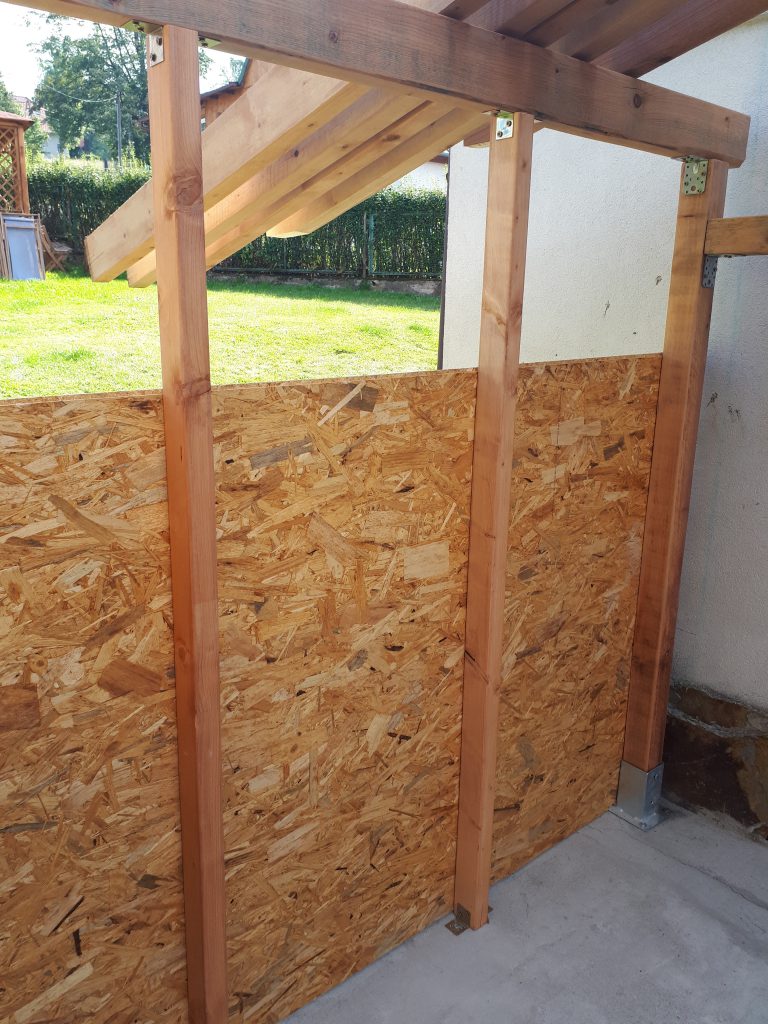
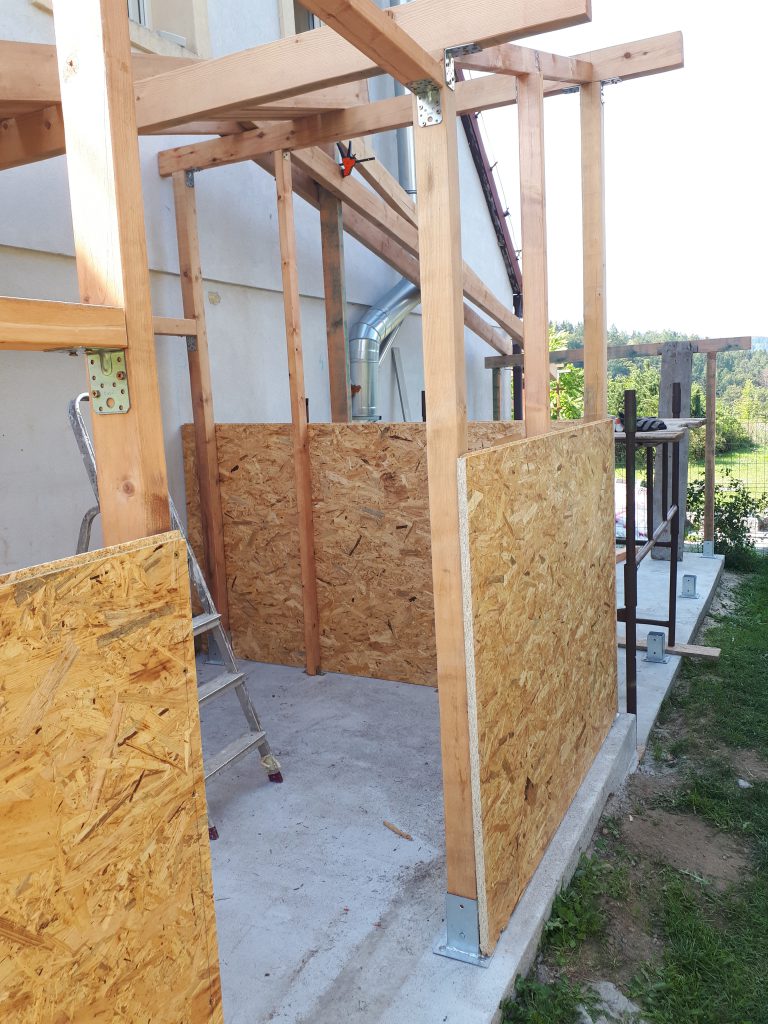
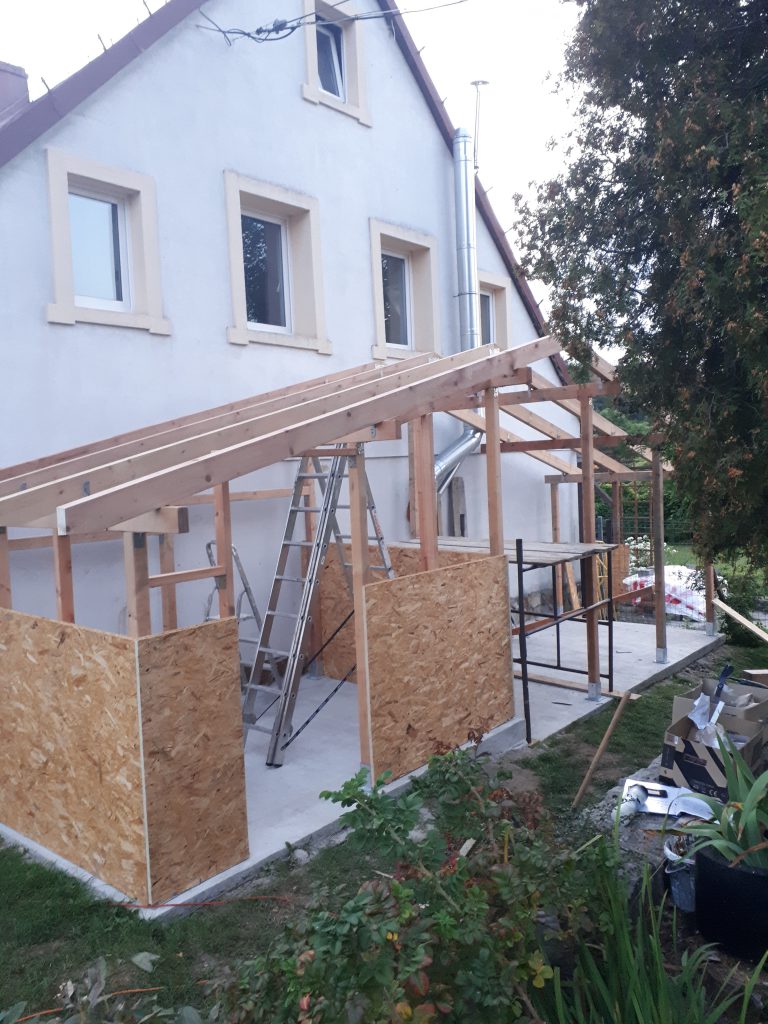
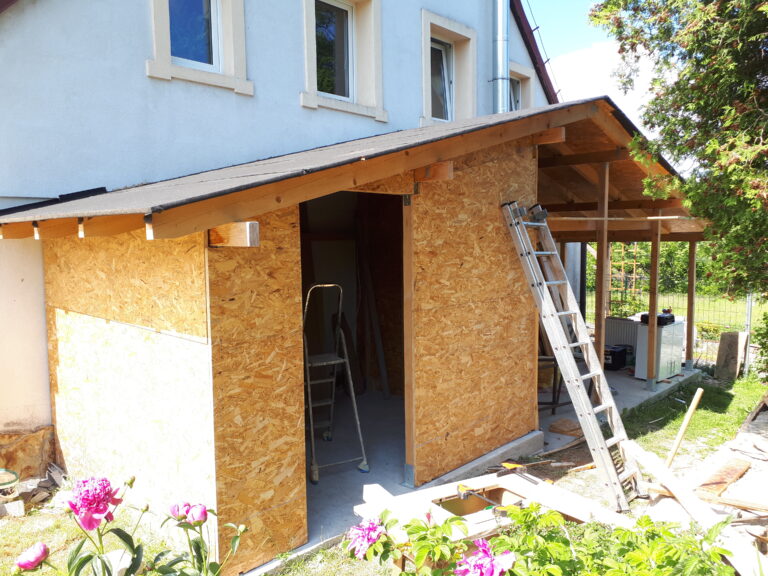
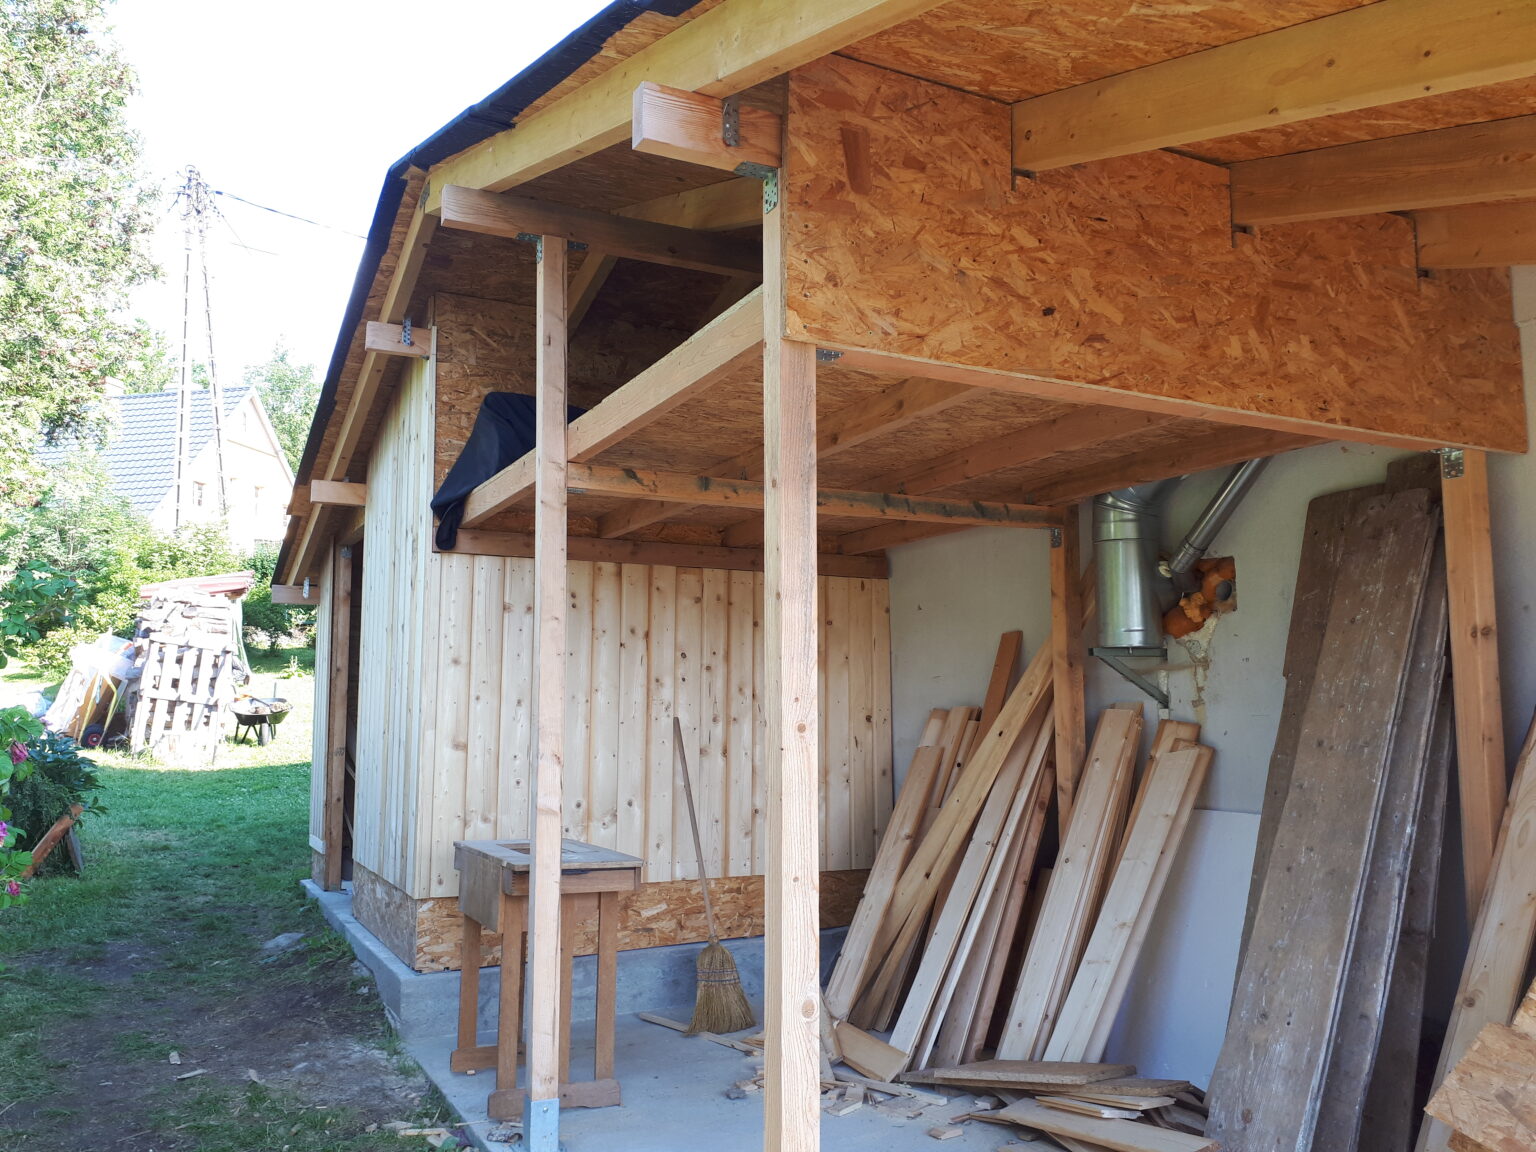
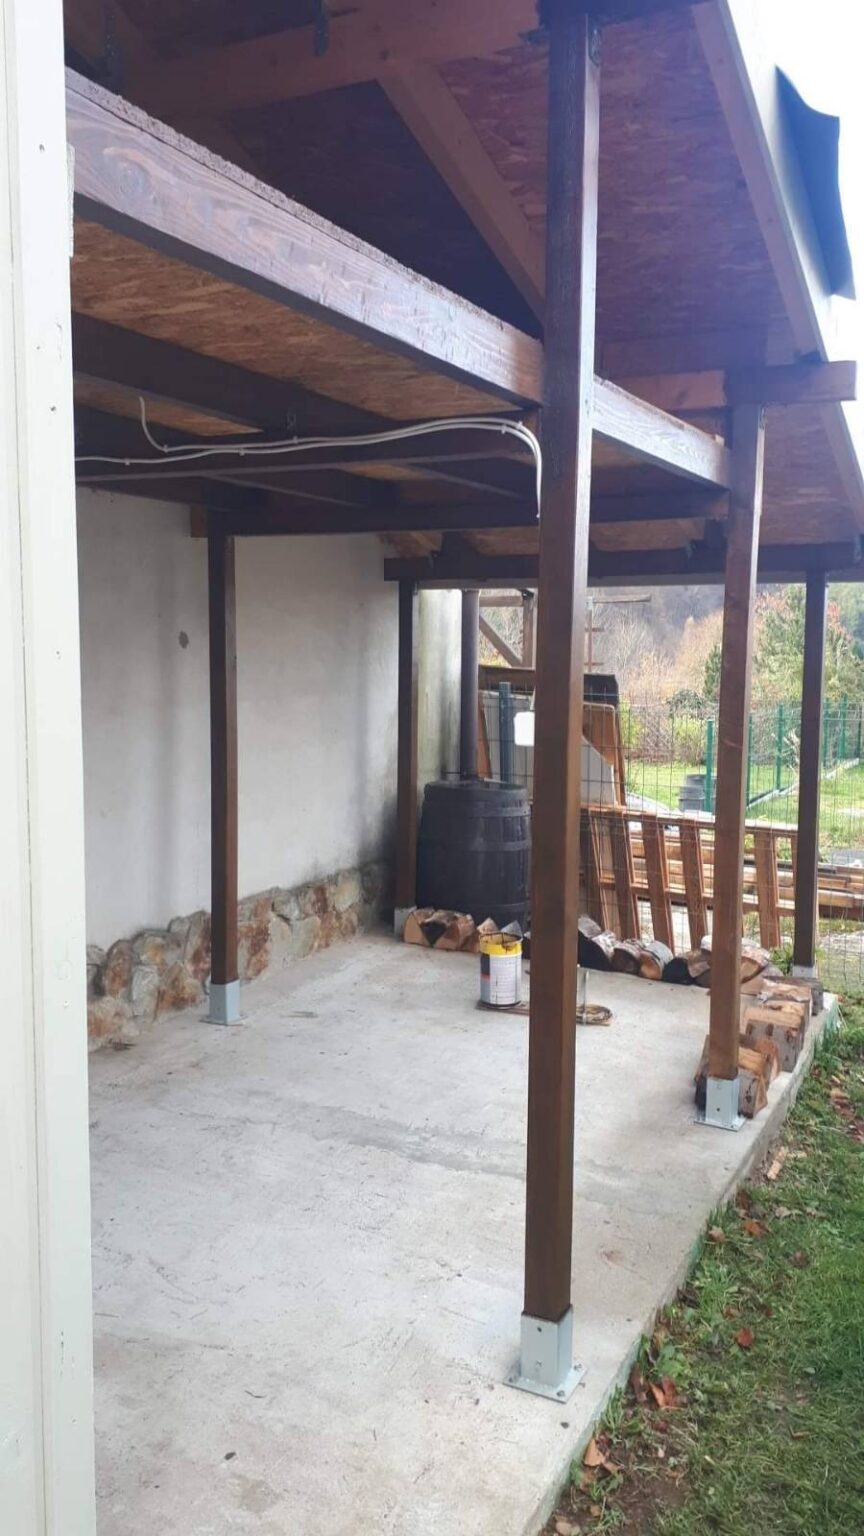
Then I proceeded to frame the walls. I bolted all the pillars to the concrete and used one OSB board per wall only to make everything more rigid. I was planning to fully sheathe all walls later.
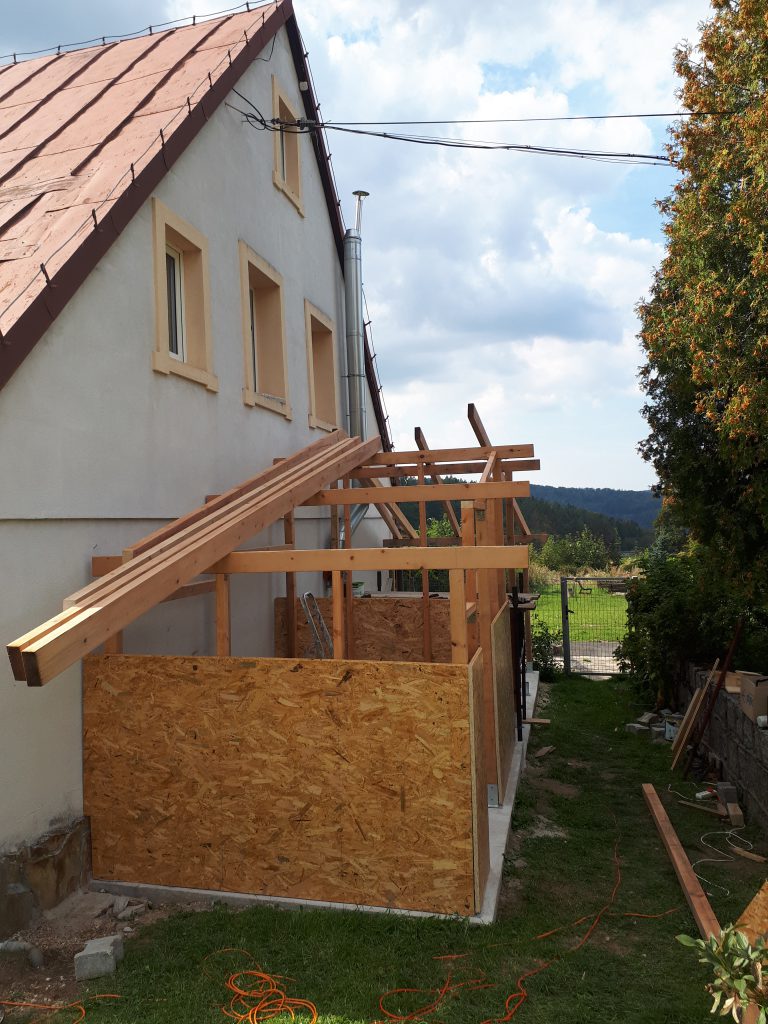
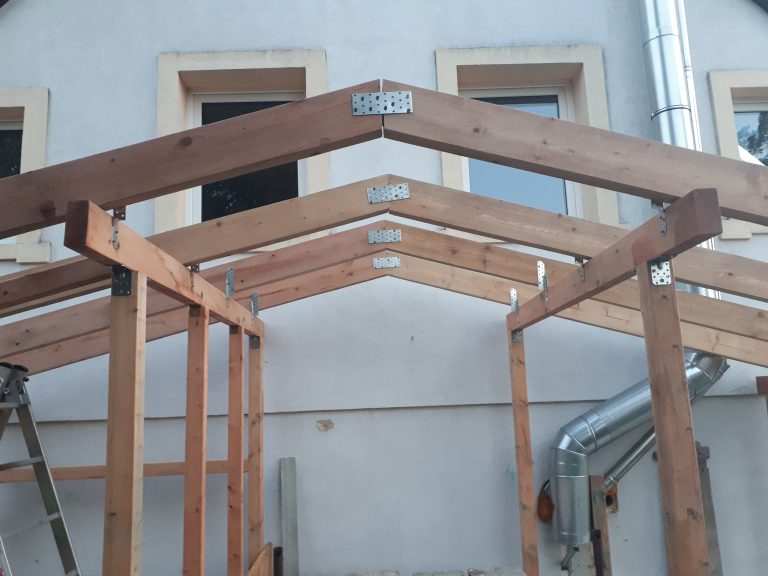
Once the walls were squared and straight I proceeded to cut rafters.
After I cut all the rafters I had to find a center of the shed where all the rafters would be connected to each other. Once it was done I could cut and connect rafters to the rest of the structure.
I connected all ends of the rafters with each other using metal plates and screws. To connect rafters to the beams I bought rafter anchors and also screwed them together.
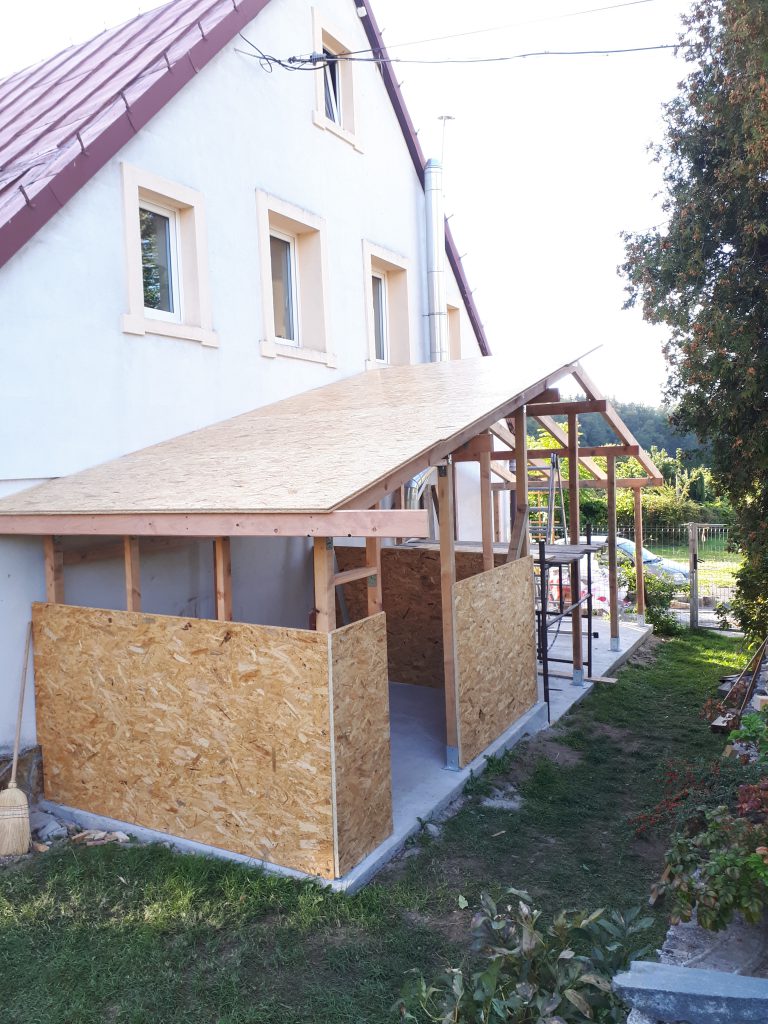
After I placed and connected rafters I could proceed to sheathe the roof.
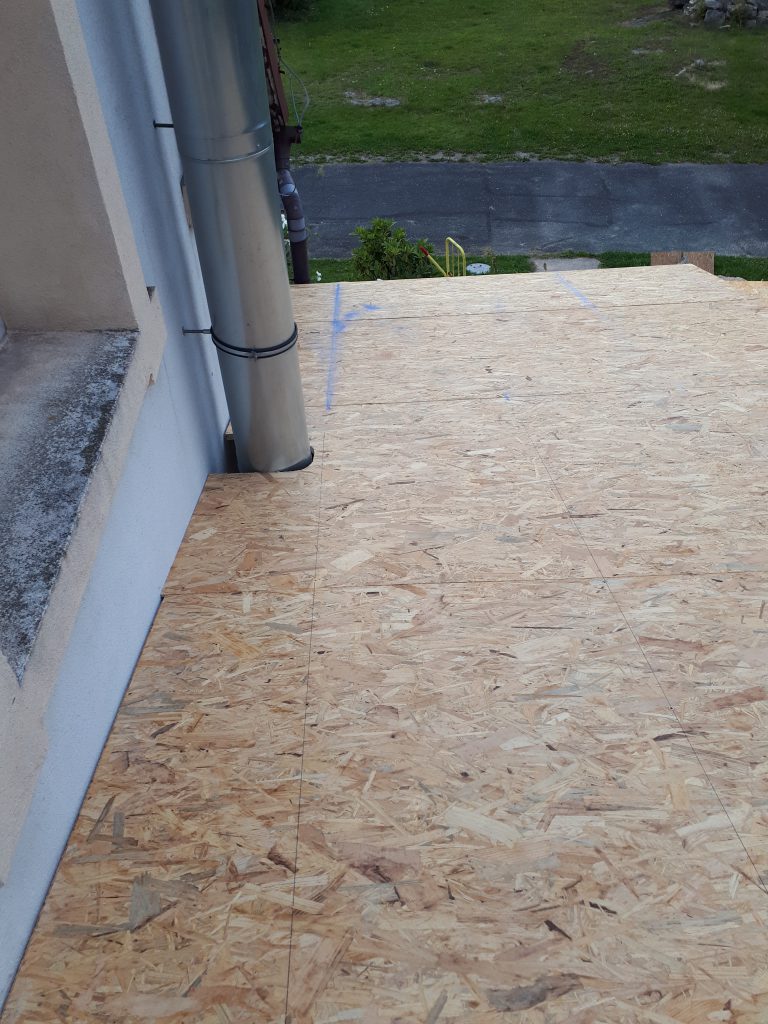
I used OSB and screws to cover the roof.
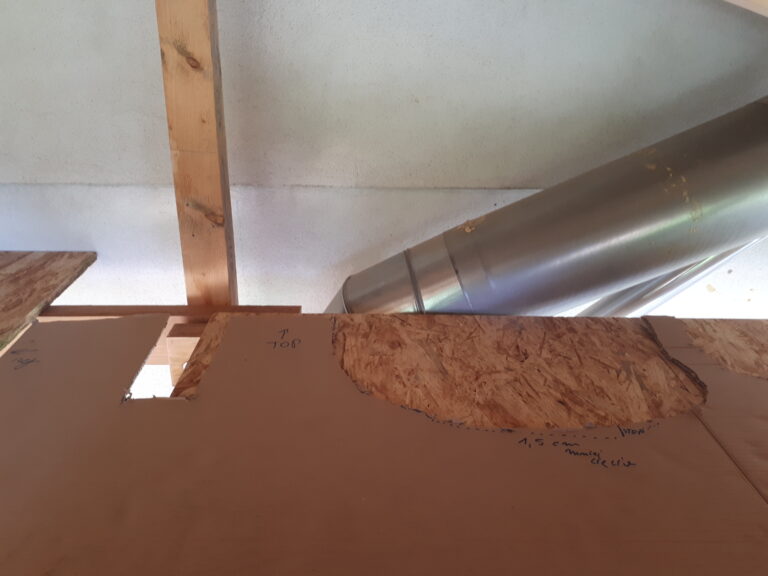
I cut a hole for the heating pipes.
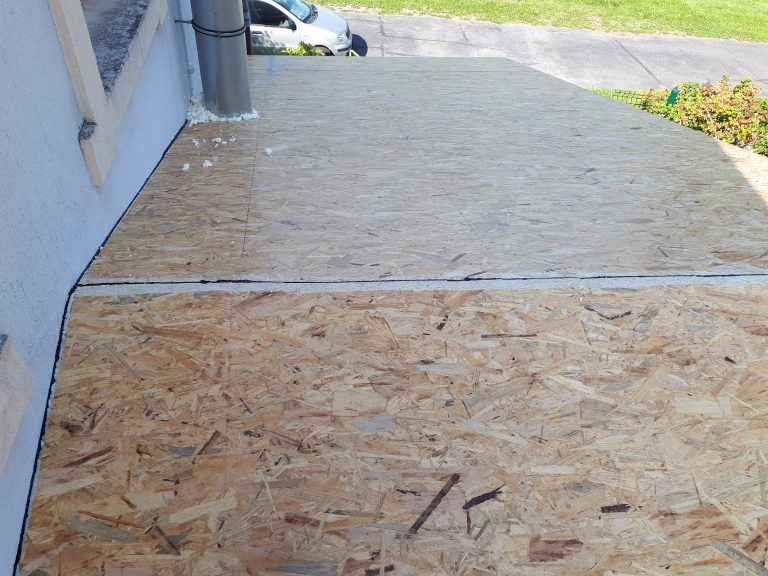
I had to fill the gaps especially these between the roof of the shed and house wall and big spaces around pipes. I used polyurethane foam and a roofing sealant to do so.
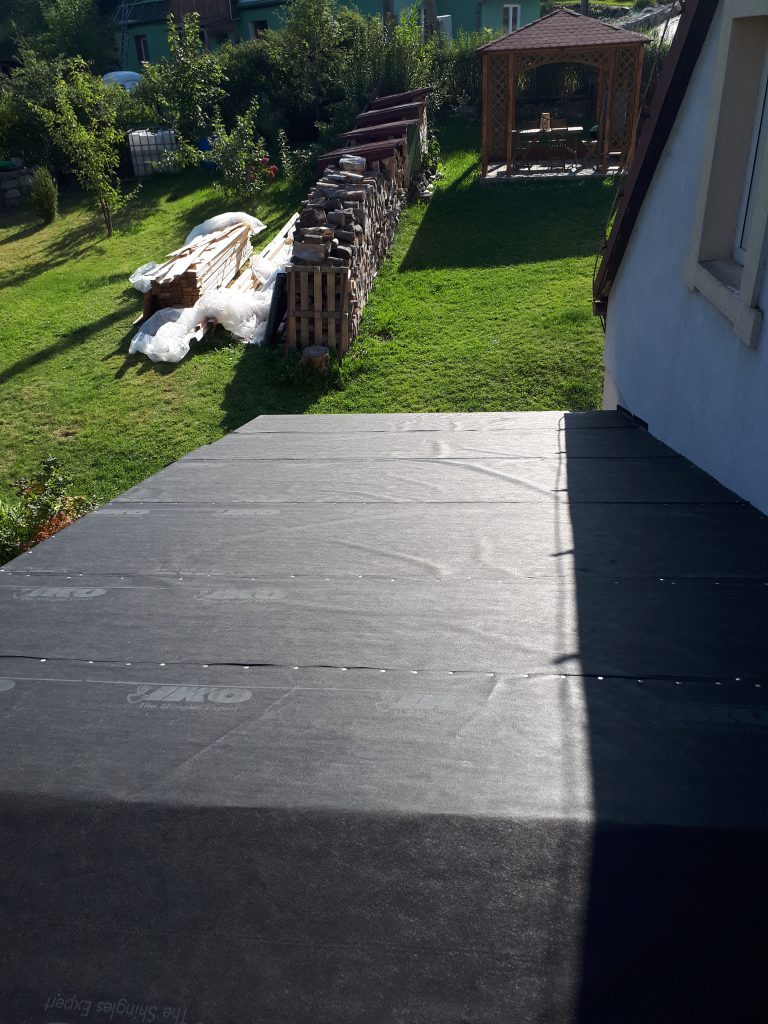
Then I used a special membrane to keep the roof waterproof. I attached it to the roof using special nails.
I plan on putting shingles on top of this membrane in the future.
I covered all weak spots with the membrane and put an extra layer of roofing sealant around these two pipes.
I couldn’t finish the shed before winter, but fortunately I had enough time to secure the entire construction from getting wet.
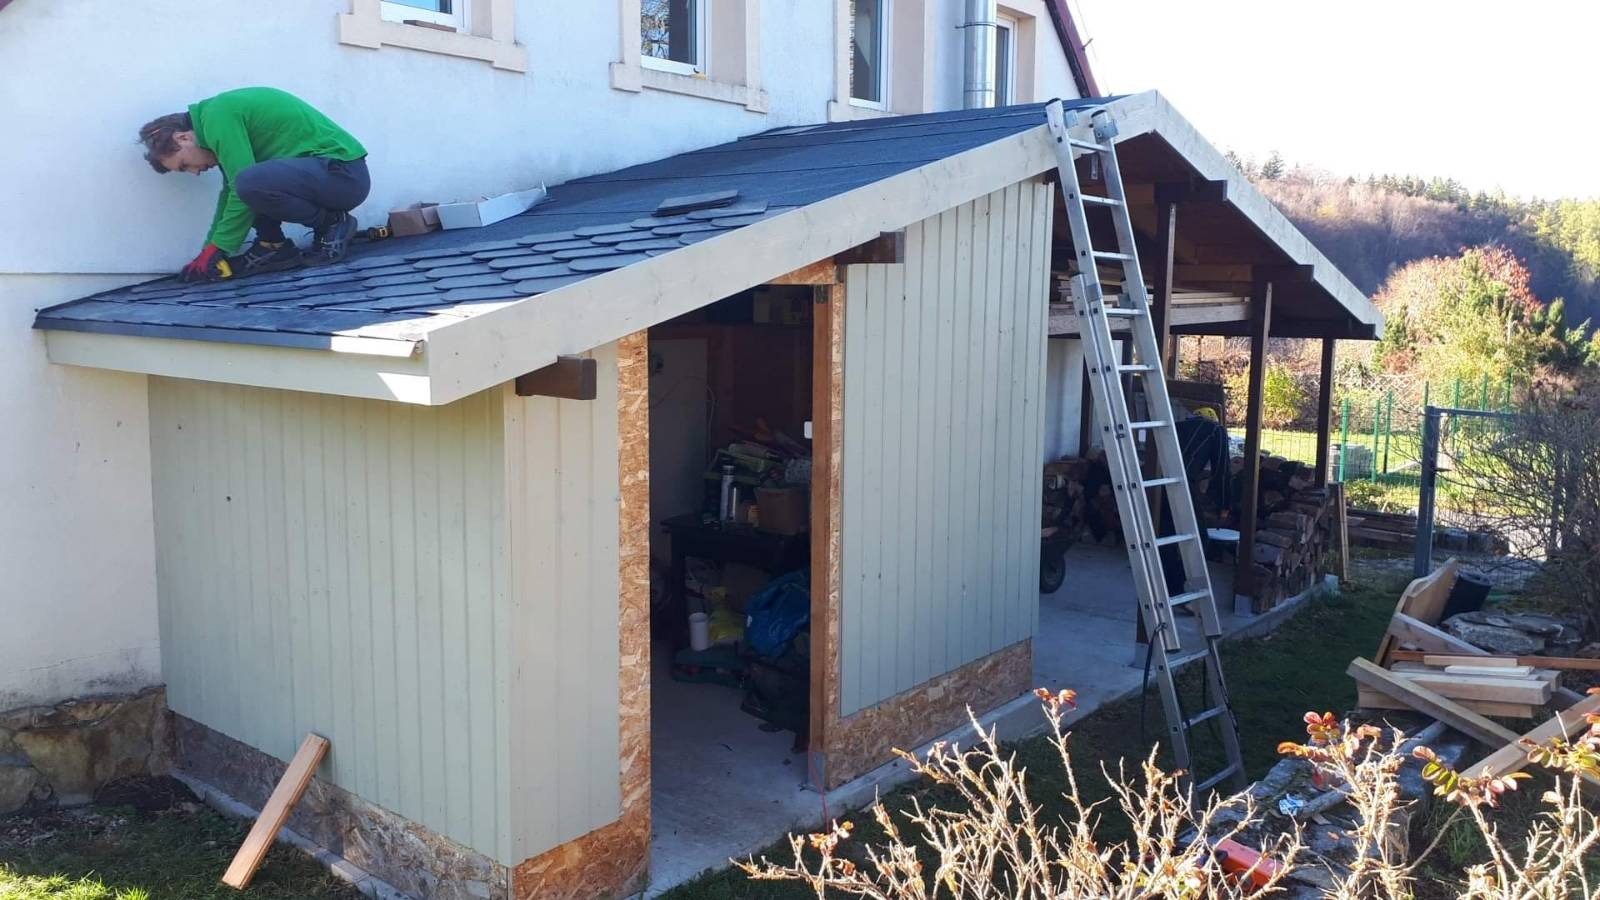
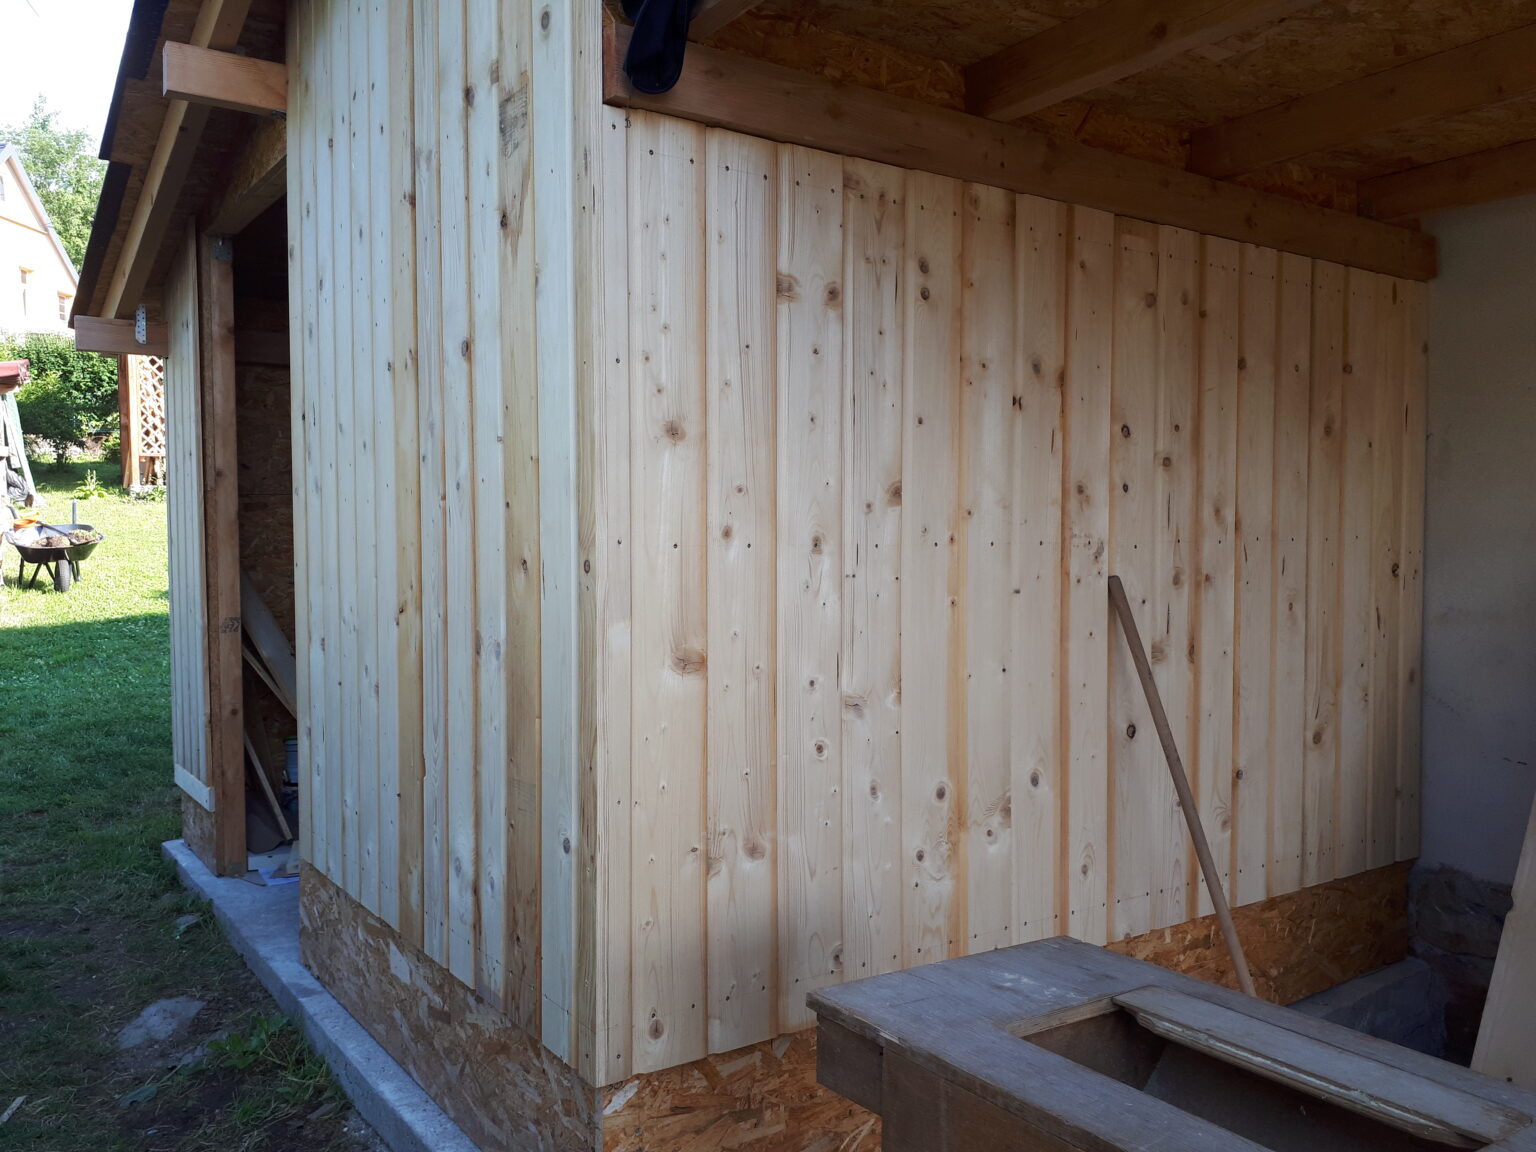
First thing I did after winter, was to finish covering walls with OSB.
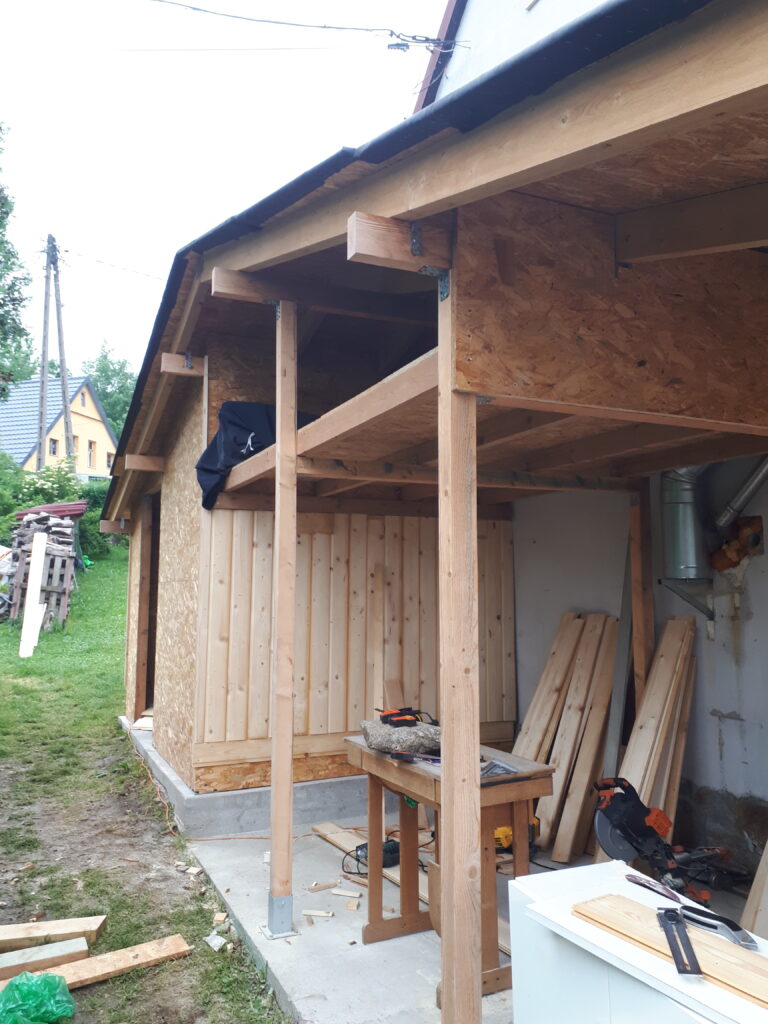
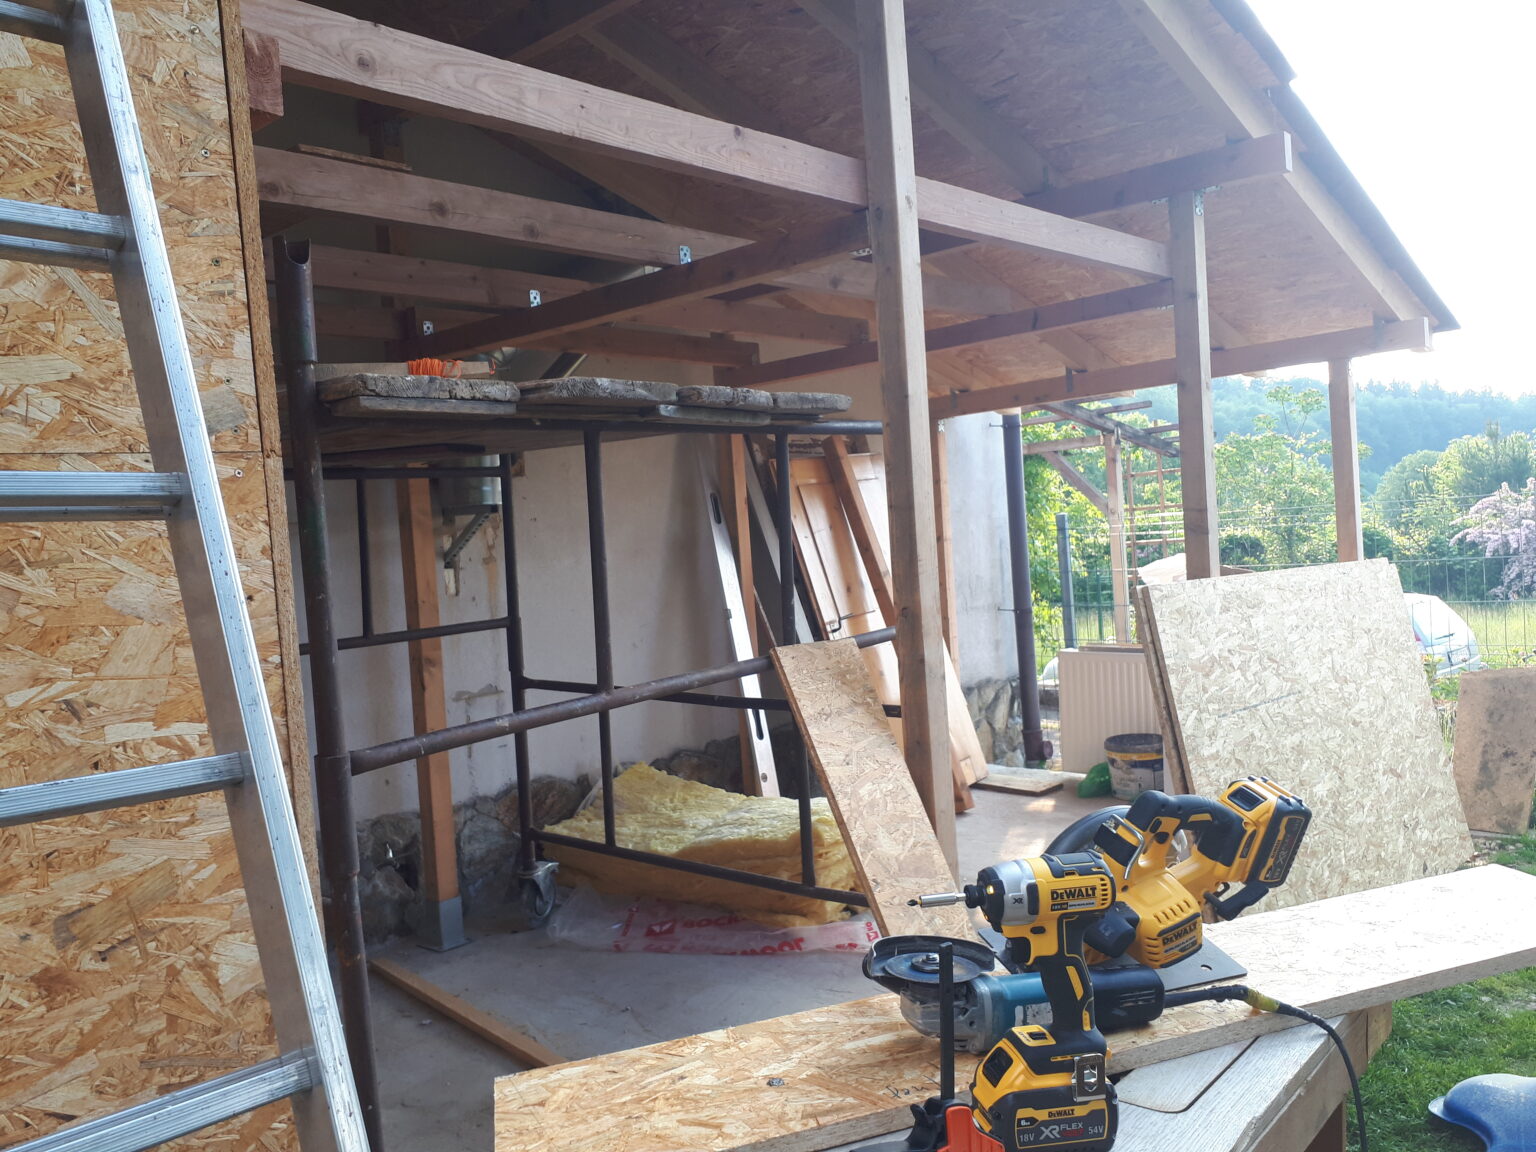
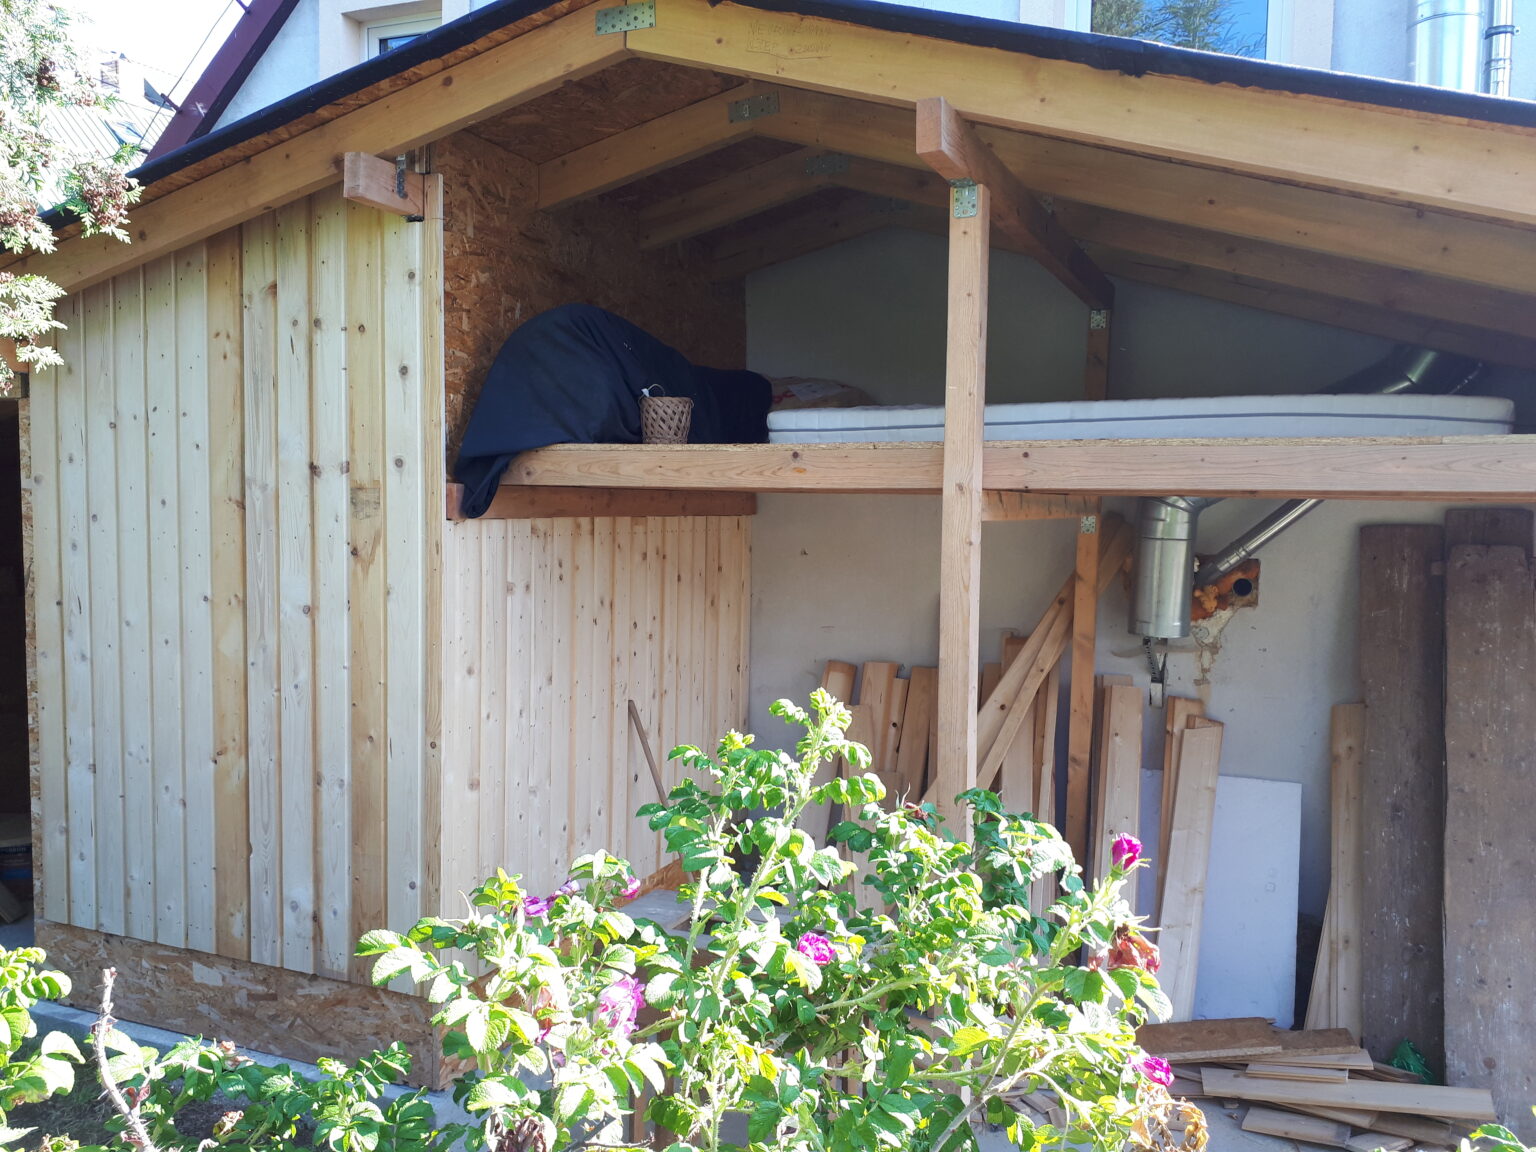
Then I built a small attic to utilize space under the roof.
I covered the attic’s floor with OSB sheets.
Because of the two pipse that go along the house wall I had to precisly fit attic’s floor. In order to do this I used cardboard template to cut everything accurately.
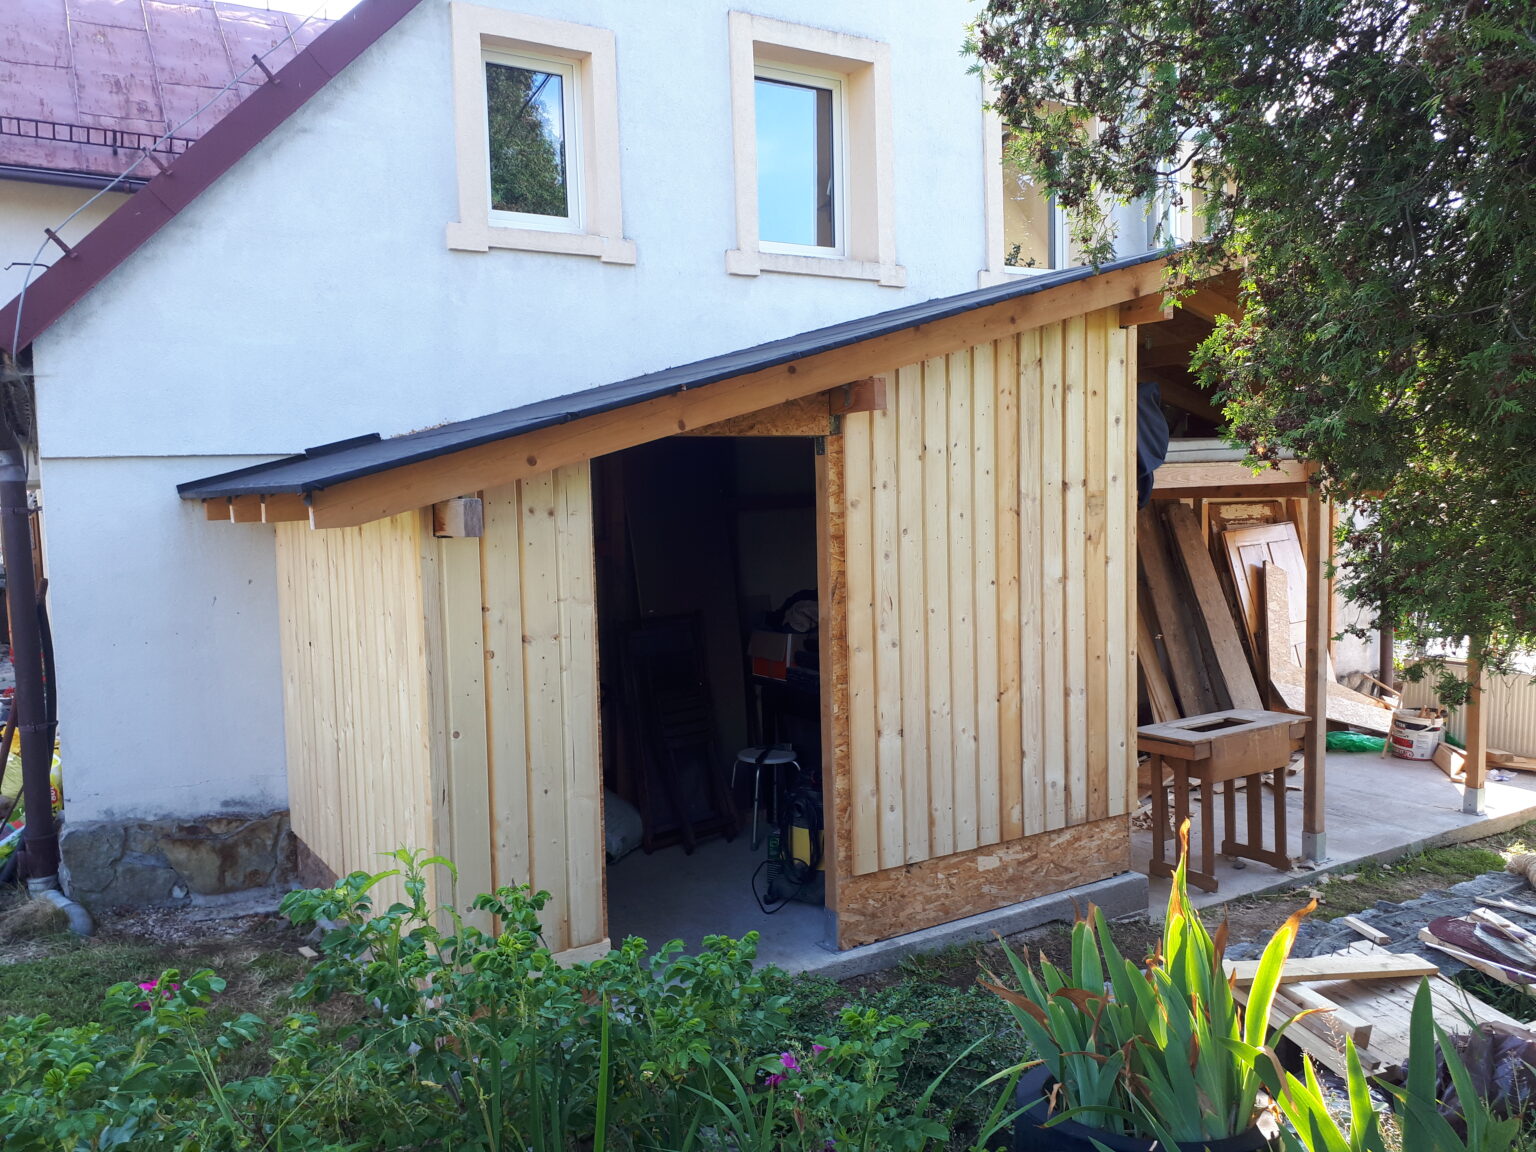
After that I proceeded to cover walls with wooden boards.
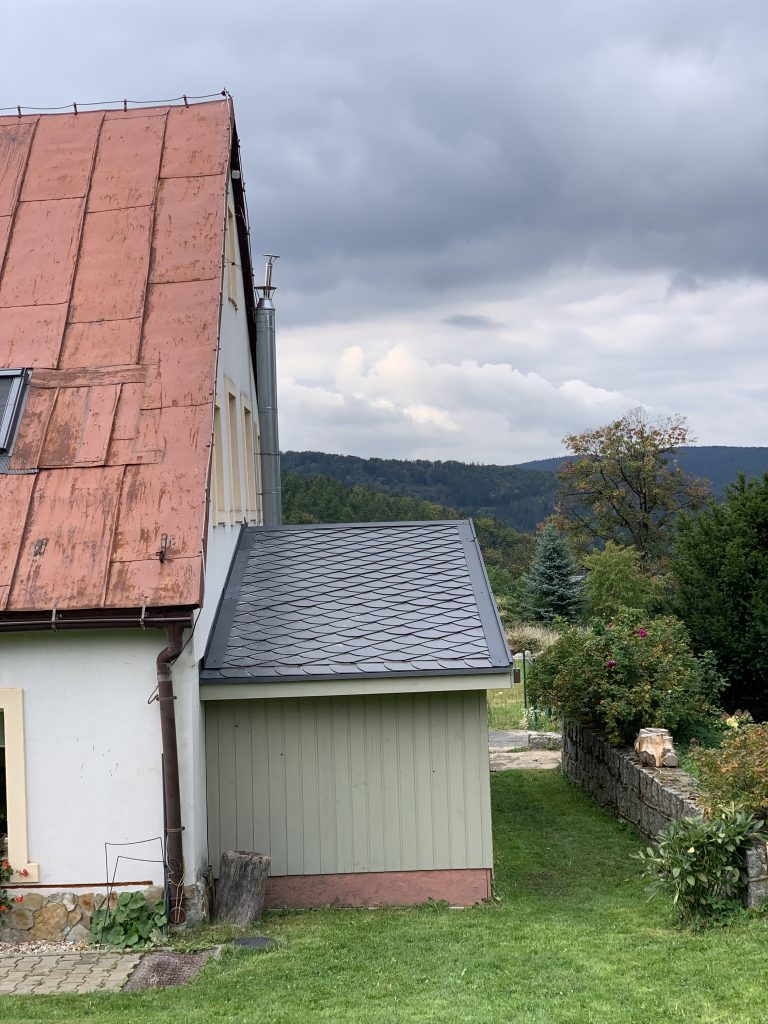
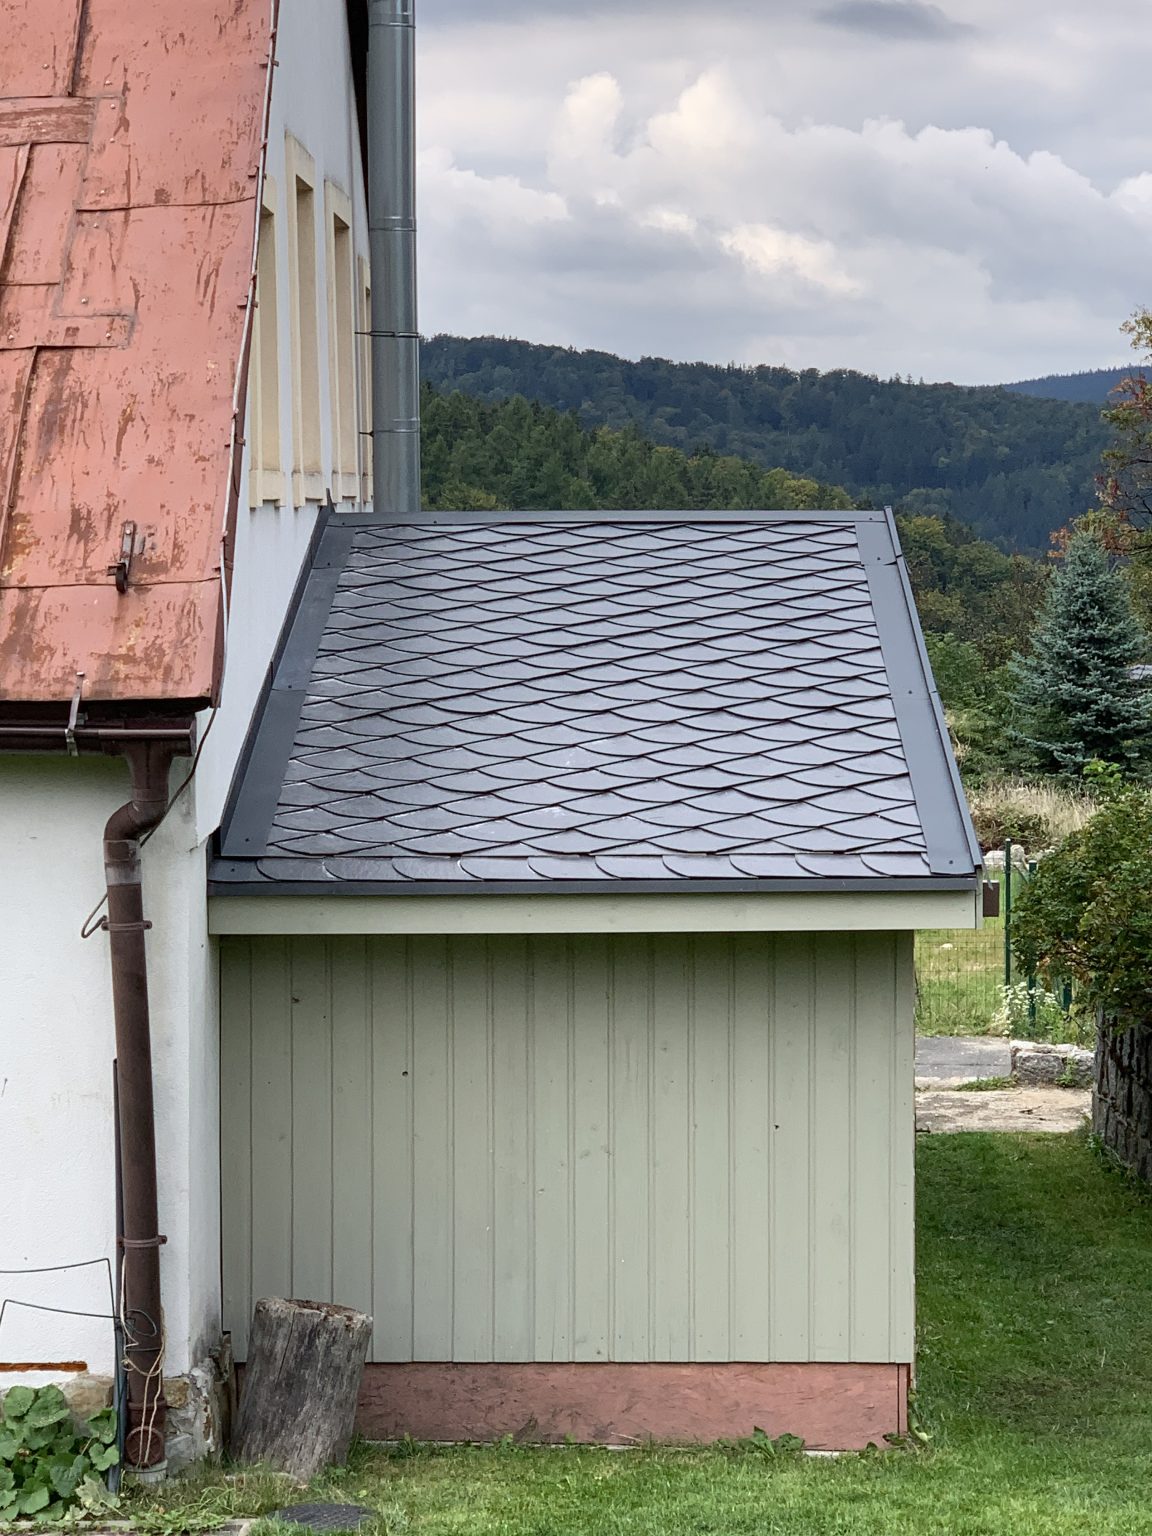
After I painted the walls, it was finally time to finish the roof.
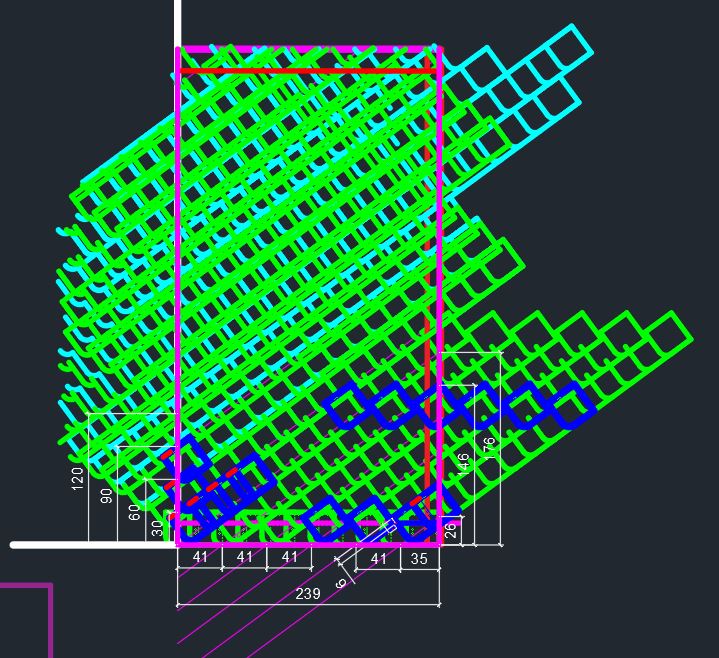
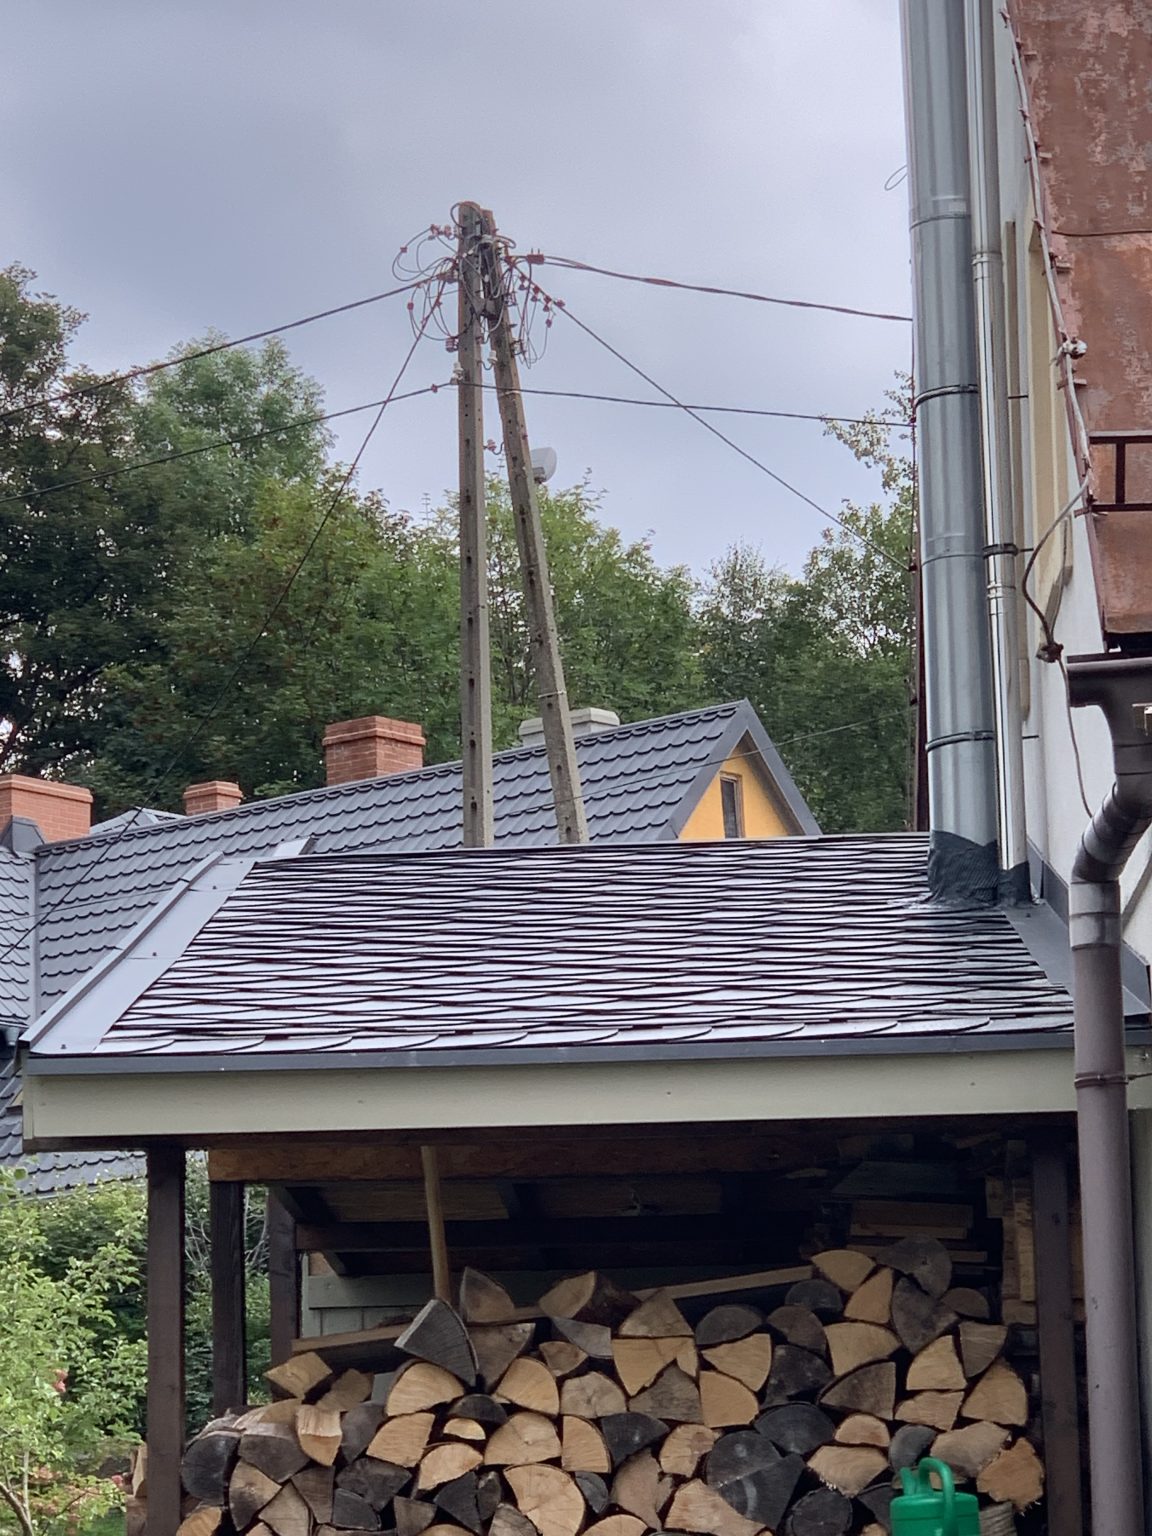
Laying this specific roof style wasn’t easy, because the shape of the roof tiles is complex and not symmetrical, and they have to be laid down at the right angle and with the right spacing.
Thus, I decided to draw the layout in AutoCad first, so I can adjust the angles and spacing between tiles so they fit on the roof.
To be sure the roof won’t leak, I added special metal roofing panels on all edges.
Gallery
To see more detailed technical drawings and blueprints of this and other of my projects click this button: